Blog

Categorised by 'Software & Applications'.

  • robocopyApologies for making a reference from the social-satire/sci-fi film that is RoboCop (1987) in my post title. It just had to be done when talking about some tool called RoboCopy. For those who aren’t aware of what RoboCopy is, where have you been? In all honesty, I myself never heard of it until a few days ago.
    RoboCopy is a command-line run tool that allows you to copy files from one directory to another. One of its most popular uses for RoboCopy is it’s ability to copy large volumes of files quicker than carrying out a manual copy and paste through a GUI, making it ideal for backup jobs. So you could easily write a backup script to run via a Schedule Task on a daily basis.

    I managed to backup around 80Gb of files in less than an hour. What’s even more impressive is that I could run numerous RoboCopy scripts at the same time. Currently, I have only run two scripts simultaneously just to be on the safe side.

    Prior to RoboCopy, I was using another command-line tool: XCopy. For my backup purposes XCopy did exactly what I wanted it to do until I came across a misleading error message: “Insufficient memory”. You would think this message would mean the destination directory to where your files are copying to is full or not enough memory resources. In matter of fact this error only happens when the fully qualified file path is longer than 254 characters. Unfortunately, I couldn’t get around this error due to the nature of how my directories are structured. Luckily, RoboCopy doesn’t have this limitation.

    One of the major strength’s of RoboCopy is the number of useful options you have at your disposal. A few example’s are:

    • Moving files.
    • Exclude certain files and file types.
    • Detailed logging that tells you new the files that have been copied or over-written.
    • Parameterised scripting.

    Example Script

    @ECHO OFF
    
    ECHO PROCESSING BACKUP ...
    
    robocopy \\work\Projects\ F:\Projects\Backup\ /mir /sl
    /log:"F:\Logs\Projects-%date:/=%.log"
    
    ECHO BACKUP COMPLETED!
    

    The script I have provided is what I use to backup files through a Schedule Task that runs at the end of every day. This script mirrors the source drive exactly. So any files that have been deleted, updated or created will have the same effect on the backup drive. In addition, a log file is created when RoboCopy is running.

    More Information

  • Earlier today, I decided to upgrade my laptop’s hard drive to a larger capacity disk. As we all know, the most straight-forward method of carrying this out is by cloning the existing drive onto your new disk of choice. Originally, I was planning on purchasing “Acronis True Image” since this is something I’ve used it in the past and makes cloning any disk a cinch!

    I decided to look for some freely available cloning software available online, instead of having to pay £30 for software I won’t be using that often. Yes I am that tight! :-) In all honesty, I wasn’t expecting to find anything substantial but I was surprised to find a great piece of cloning software called “EaseUS Todo Backup” free edition. EaseUS Todo Backup software not only had the ability to clone a disk but also had the following useful features:

    • Backup – on selected files, partitions or your entire computer
    • Recovery
    • Scheduled backup plan

    I am happy to report that I managed to clone the whole of my disk drive successfully within 2.5 hours (based on 126GB of data). Whoever said nothing in life is free!

    You can download EaseUS Todo Backup here.

  • Arrrgh!!! Microsoft has to be the yearly winner for the “Most Stupid Error Message” award for displaying the most excruciatingly annoying error messages in any of their products. The main reason for their annoyance is because majority of the error messages tells you something is wrong, but not the source of the error. A good example of this is: “Cannot delete file. This file is in use by another program or user”.

    I am not expecting the error message to tell me the exact cause of the error but at least some meaningful information on what could be the issue. Anyway, back to the error at hand…

    I found a really great bit of free software that fixes the problem. Its called Unlocker and you can download it here. It allows you to see exactly what processes are currently using the file you are trying to delete, edit or move. What’s even better is that Unlocker can kill the processes within its UI.

  • Over the last week or so, I have had the most frustrating time creating a Mac OS X Snow Leopard environment using VMware. I won’t go into the whole process I went through to create my Virtual Machine. There are many online articles for you to Google (or Bing :-P) that show you the step-by-step procedures on how to create a Mac OS virtual environment.

    All I can say it took a lot of blood, sweat and tears! You may find that you need to cross-reference between a few sites in order to get the winning combination for a working VMware environment.

    Anyway, if you are one of the lucky ones to have successfully built a Snow Leopard environment, you may have come across an issue whereby your VMware environment randomly freezes for no apparent reason. Now this is quite annoying. After much searching and constant VMware configuration changes, I could not get to the bottom of the issue. I knew that it could not have been to do with the setup, after all I had a fully functioning Mac environment.

    What I noticed is that my environment would never freeze whilst I was using it. It only froze if I left it idle for long periods of time. You are now probably thinking:

    GET TO THE POINT! HOW DID YOU FIX IT???

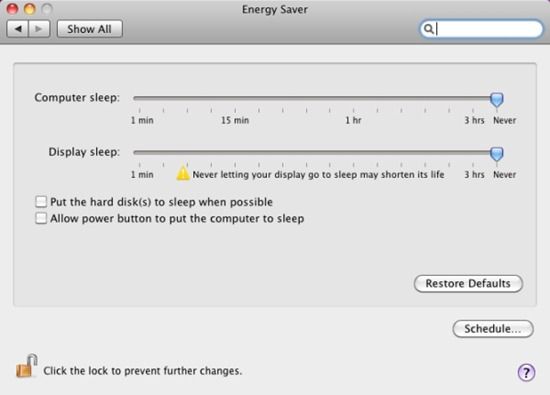
    Well the cause of the environment to freeze is due to the Energy Saver settings found under System Preferences in your Mac OS (Apple icon > System Preferences > Energy Saver). You will find that it is default to 15 minutes idle time before going into sleep mode. All you need to do is set both Computer Sleep and Display Sleep to Never. As a precaution I also unticked the “Put the hard disk(s) to sleep when possible"

    MacOSEnergySaver

  • I needed to create a custom web part using Visual Studio 2003 for a SharePoint 2003 client intranet, something I have never done before. As fellow SharePoint developers will know, you need to strongly name your project assembly whenever you need deploy a custom made web part.

    Visual Studio 2005 and onwards allows you to easily create a strongly named key through the graphical user interface. In Visual Studio 2003, you will need to use the Visual Studio 2003 Command Prompt. You can find the Visual Studio 2003 Command Prompt by going to: Start > Program Files > Visual Studio 2003 > Visual Studio.NET Tools > Visual Studio .NET 2003 Command Prompt.

    Visual Studio 2003 Command Prompt

    Once the command prompt window has opened all you need to do is enter the following to create a SNK:

    Setting environment for using Microsoft Visual Studio .NET 2003 tools.
    (If you have another version of Visual Studio or Visual C++ installed and wish
    to use its tools from the command line, run vcvars32.bat for that version.)
     
    C:\Documents and Settings\Administrator\Desktop>sn -k MyKey.snk
     
    Microsoft (R) .NET Framework Strong Name Utility  Version 1.1.4322.573
    Copyright (C) Microsoft Corporation 1998-2002. All rights reserved. 
     
    Key pair written to MyKey.snk
     
    C:\Documents and Settings\Administrator\Desktop>
    

    As you can see from my command prompt example above, I am creating a new SNK file called MyKey.snk. This SNK file will be generated on my Desktop.

  • In Windows XP you had the option to analyse a disk drive you wished to defragment without carrying out a full disk defragmentation. Looking at the Windows Vista Disk Defragmenter GUI at face value I thought this feature was left out. After some research, I found that this  this feature has been included but you will be forgiven for not knowing where it is. Fortunately, using the command line tool does allow you to analyse a drive. It is as simple as typing the following:

    1. Open up Command Line tool.

    2. Type the following: defrag –a <disk drive letter>

    3. Press enter and you will see the following:

    Microsoft Windows [Version 6.0.6000]
    Copyright (c) 2006 Microsoft Corporation.  All rights reserved.
    
    C:\Users\Surinder>defrag -a c:
    Windows Disk Defragmenter
    Copyright (c) 2006 Microsoft Corp.
    
    Analysis report for volume C:
    
        Volume size                         = 298 GB
        Free space                          = 236 GB
        Largest free space extent           = 136 GB
        Percent file fragmentation          = 1 %
    
        Note: On NTFS volumes, file fragments larger than 64MB are not included in the fragmentation statistics
    
        You do not need to defragment this volume.
    

    Neato!!

  • Published on
    -
    1 min read

    Free McAfee Internet Security 2009

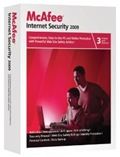
    McAfee-Internet-Security-2009-Free-3-Months-Trial What a way to start the new year with some free software (and I am talking the legal way). I found that my current PC Internet Security was soon to expire. Instead of renewing my existing Bullguard licence, I decided it was time for a change after being a loyal three year customer mainly because the yearly fee was starting to get a bit too expensive compared to other packages on the market.
    As usual I always look at the customer reviews on the Amazon web site, which is always useful. But this time I found one the reviews someone written more useful than others. It contained a coupon code for a free copy of McAfee Internet Security from the US McAfee website.

    All you need to do in order to get your free copy of McAfee Internet Security 2009 is to carry out the following:

    1. Go to http://us.mcafee.com/root/campaign.asp?cid=53347.
    2. Enter coupon code: VSPPROMOCF. You will magically see the Grand Total is now $0.00.
    3. Ensure that there is only one copy of Internet Security in your basket for one user.
    4. Click on the "Checkout" button and register your new account. This account will just contain details of when your year subscription will expire.

    Awesome!

    I am not too sure how long it is valid for. But give it a try. It worked for me!

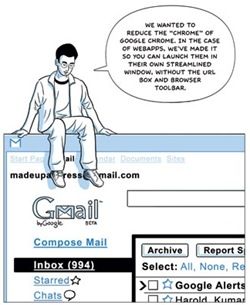
  • I have to say that I am quite impressed with the way Google markets its own applications and services. Who would ever had thought of using a comic string to introduce the key workings of a specific application? Its a lengthy comic to say the least, consisting of 38 “fun filled” pages, which actually makes learning about the Chrome browser an interesting read.

    Google Chrome Comic 1

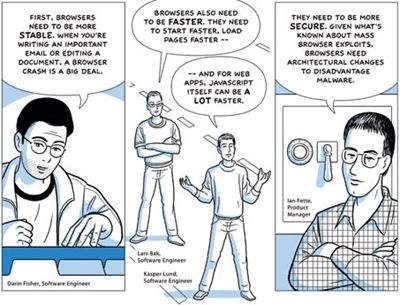
    Google Chrome Comic 2

    But this does ask the question on why Google is releasing their own browser? I thought they had extended their search deal with Mozilla Firefox in return for setting Google as the default search engine. I guess this may cause an awkward relationship between the two in the future. But I suppose any attack against the dreaded Microsoft Internet Explorer browser can only be a benefit!

    I have to say that the guy wearing the glasses on the left bares a striking (less cool) resemblance to me. :-)

    You can view the full comic strip here.

  • Published on
    -
    1 min read

    Could Writing a Blog Post Get Any Easier???

    I have just installed Window Live Messenger 8.5. Yes, you might be thinking I have been a little late installing the latest version of Messenger. The reason for this is because I really had no reason to. After all I use Messenger just to talk to my friends. Nothing more, nothing less.

    Anyway. Back to this blog post. Windows Live Messenger 8.5 has a really neat tool to manage you own blog. It is called Windows Live Writer (WLW). WLW has to be the most useful application for anyone who is an avid blogger. It features a WYSIWYG authoring, photo-publishing and map-publishing functionality, and is currently compatible with Windows Live Spaces, Blogger, LiveJournal, TypePad, Wordpress, Community_Server, PBlogs.gr, JournalHome, the MetaWeblog API, and the Moveable Type API. Even if your blogging engine is not listed here I am sure WLW will be compatible. For example, my blogging engine is BlogEngine and I was able to connect WLW to it really easily!

    There are many extensions available to add extra functionality to WLW which you can find here. I highly recommend downloading "Code Snippet". This extension makes inserting code a breeze!

    Code Snippet In Use:

    // Hello1.cs
    public class Hello1
    {
       public static void Main()
       {
          System.Console.WriteLine("Hello, World!");
       }
    }


    WLW user interface is just as what you'd expect from the Microsoft product family. Very easy and intuitive to use:

    WLWScreen

    If you have not already tried WLW I highly recommend it. You can download WLW without installing Windows Live Messenger here.

  • Published on
    -
    1 min read

    Windows Disk Cleanup Alternative

    To keep a PC running smoothly, regular maintenance is critical. Many users shy away from maintenance tasks, thinking it is a long, drawn out manual affair, but the Disk Cleanup Utility can easily determine which files on a hard drive may no longer be needed and delete those files. In addition to freeing up potentially significant amounts of hard drive space, using a Disk Cleanup on a regular basis can significantly improve system performance.

    I have always used Microsoft Windows Disk Cleanup and I was interested in seeing if there were any free software that could do a better job. After trawling through the net I was surprised to find how many programs claim to help you get back your PC into original working condition by removing all the clutter. Just as I expected most of the Disk Cleaning utilities were not free. But I did find one cleanup utility that fitted the mark quite nicely called Cleanup (well what else would it be called Tongue out!).

    CleanUp is a powerful and easy-to-use application that removes temporary files created while surfing the web, empties the Recycle Bin, deletes files from your temporary folders and more. It frees disk space and reduces the "clutter" on your computer helping it to run more efficiently. It also can be used as a way to protect your privacy on the Internet. You can even instruct CleanUp to securely delete files making it impossible to retrieve their contents using lower-level disk tools - just another way of protecting your privacy.

    You can download the program here.

    WARNING!: This program is a really thorough piece of kit because it can even delete your Bookmarks if you have not selected the right options:

    Cleanup Options