Reducing The Number of 'Crawled - Currently not indexed' Pages
Every few weeks, I check over the health of my site through Google Search Console (aka Webmaster Tools) and Analytics to see how Google is indexing my site and look into potential issues that could affect the click-through rate.
Over the years the content of my site has grown steadily and as it stands it consists of 250 published blog posts. When you take into consideration other potential pages Google indexes - consisting of filter URL's based on grouping posts by tag or category, the number of links that my site consists is increased considerably. It's to the discretion of Google's search algorithm to whether it includes these links for indexing.
Last month, I decided to scrutinise the Search Console Index Coverage report in great detail just to see if there are any improvements I can make to alleviate some minor issues. What I wasn't expecting to see is the large volume of links marked as "Crawled - Currently not indexed".

Wow! 225 affected pages! What does "Crawled - Currently not indexed" mean? According to Google:
The page was crawled by Google, but not indexed. It may or may not be indexed in the future; no need to resubmit this URL for crawling.
Pretty self-explanatory but not much guidance on the process on how to lessen the number of links that aren't indexed. From my experience, the best place to start is to look at the list of links that are being excluded and to form a judgement based on the page content of these links. Unfortunately, there isn't an exact science. It's a process of trial and error.
Let's take a look at the links from my own 225 excluded pages:
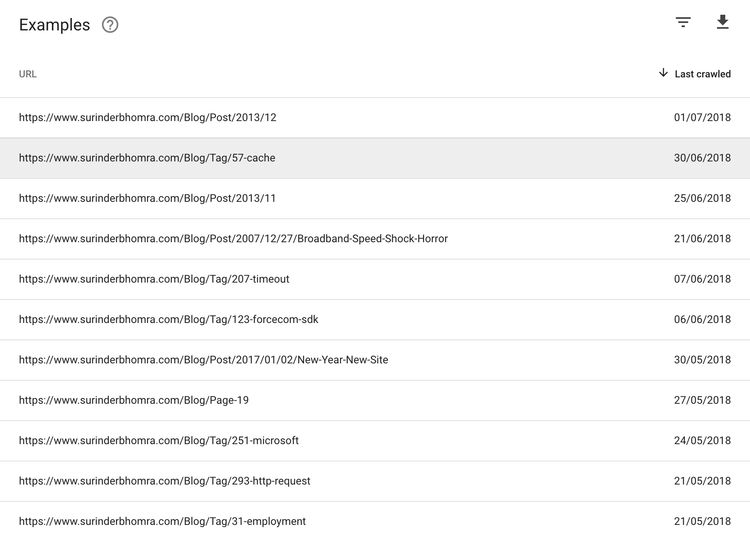
On initial look, I could see that the majority of the URL's consisted of links where users can filter posts by either category or tag. I could see nothing content-wise when inspecting these pages for a conclusive reason for index exclusion. However, what I did notice is that these links were automatically found by Google when the site gets spidered. The sitemap I submitted in the Search Console only list out blog posts and content pages.
This led me to believe a possible solution would be to create a separate sitemap that consisted purely of links for these categories and tags. I called it metasitemap.xml. Whenever I added a post, the sitemap's "lastmod" date would get updated, just like the pages listed in the default sitemap.
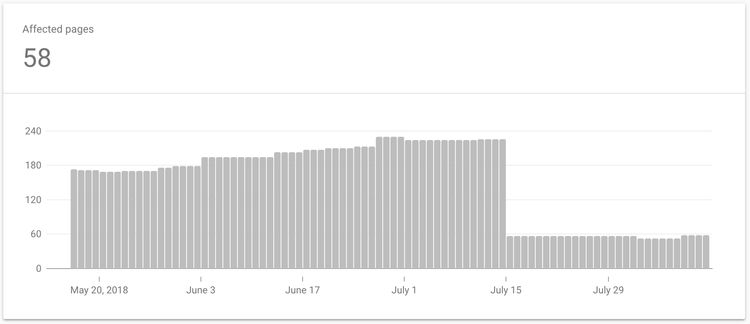
I created and submitted this new sitemap around mid-July and it wasn't until four days ago the improvement was reported from within the Search Console. The number of non-indexed pages was reduced to 58. That's a 74% reduction!
Conclusion
As I stated above, there isn't an exact science for reducing the number of non-indexed pages as every site is different. Supplementing my site with an additional sitemap just happened to alleviate my issue. But that is not to say copying this approach won't help you. Just ensure you look into the list of excluded links for any patterns.
I still have some work to do and the next thing on my list is to implement canonical tags in all my pages since I have become aware I have duplicate content on different URL's - remnants to when I moved blogging platform.
If anyone has any other suggestions or solutions that worked for them, please leave a comment.