Blog

Categorised by 'Hosting and Infrastructure'.

  • I have multiple email addresses spanning across a handful of domains. For the majority of them, email accounts need to be set up for each one of these domains. After a while, the costs start to add up, especially when some of these email accounts receive only a few emails. In addition, daily checking of emails across separate accounts can be somewhat a little painful.

    Normally, I would use a feature in my personal Gmail account that allows me to not only check emails from other email accounts but also respond to received emails in one place. But there are a couple of limitations, such as there is the number of external email addresses that can be added and the frequency to which these accounts are checked for new messages.

    Enter Email Aliases

    What would most suit my needs is an email alias service that will provide a single admin area to create all the email addresses for any of my registered domains. Aliases allow you to send and receive emails to an inbox of your choosing. So I could store all my emails within my Gmail account and make better use of the storage allowance.

    Simplelogin.io is the service which does just that. I’ve been trialling the Premium tier for a week, allowing me to add aliases to multiple custom domains and (the handiest feature) reply to emails sent to the alias. Setup is relatively swift consisting of some domain-level DNS updates and creating a mailbox for emails to be forwarded to.

    By connecting my Gmail account as a mailbox for SimpleLogin to forward emails, sending and receiving emails feels really native. I now have a central area to check emails within my Google account whilst also adding an additional layer of security.

    I am always wary of sharing my Gmail email address as Google houses a lot of my private information - Photos, Email and Drive documents/files. I prefer to err on the side of caution when it comes to anything relating to my Google account.

    For my everyday use, I decided to set up the following aliases against a newly registered personal domain based on the different types of websites I use:

    • shopping@
    • technical@
    • social@
    • random@

    If for any reason any one of my email aliases gets compromised due to a data breach or excessive spam, I can quite easily remove the offending alias. SimpleLogin.io also provides the option to generate temporary email aliases if needed - useful for times when you need to sign-up just to get some free promotion without disclosing one of your core email addresses.

    Going through this process will hopefully give me a chance to finally phase out my very old "ntlworld.com" related ISP email accounts - something I've been meaning to do for a very long time. I find it quite amazing my old ISP email accounts are still in service, which were originally set up when my Dad first connected our family household to the sweet sweet taste of mega-fast broadband back in the early 2000s.

    Other Options

    At one point, I considered hosting my mail server using my ever-useful Synology NAS to save costs in purchasing further email hosting. This idea was quashed relatively quickly as I just don't trust the uptime of my ISP or my home networking setup - though might be a suitable option for those who do.

    Conclusion

    Adopting email aliases has allowed me to rethink and re-organise how I want my emails to be used on a day-to-day basis. When you take into consideration the overall cost, security and privacy benefits, it's the email service I never knew I needed until now.

  • As I have been delving deeper into adding more functionality to my Gatsby site within the Netlify eco-system, it only seemed natural that I should install the CLI to make development faster and easier to test builds locally before releasing them to my Netlify site. There have been times when I have added a new feature to my site to only find it breaks during the build process eating up those precious build minutes.

    One thing that I found a miss from the Netlify CLI documentation were the steps to running a site locally, in my case a Gatsby JS site. The first time I ran the netlify dev command, I was greeted by an empty browser window served under http://localhost:8888.

    There were a couple of steps I was missing to test my site within a locally run Netlify setup.

    1) Build Site

    The Gatsby site needs to be compiled so all HTML, CSS and JavaScript files are generated as physical files on your machine. When the following command is run, all files will be generated within the /public folder of your project:

    gatsby build
    

    The build command creates a version of your site with production-ready optimisations by packaging up your site’s configurations, data and creating all the static HTML pages. Unlike the serve command, you cannot view the site once the build has been completed. Only files are generated, which is exactly what we need.

    2) Run Netlify Dev Command From Build Directory

    Now that we have a built version of the site generated locally within the /public folder, we need to run the Netlify Dev command against this directory by running the following:

    netlify dev -dir public
    

    As you can see, the dir flag is used to run our site from where the compiled site files reside. I originally had a misconception in thinking the Netlify Dev command would build my Gatsby site as well, when in fact it does not.

    Conclusion

    If you have a site hosted by Netlify, using the CLI should is highly recommended as it provides you that extra step in ensuring any updates made can be tested prior to deployment. My site uses Netlify features such as redirects and plugins, which I now can test locally instead of going down the previously inefficient route of:

    1. Deploying changes to Netlify.
    2. Waiting for the build process to complete.
    3. Test changes within the preview site.
    4. If all is good, publish the site. If not, resolve error and deploy again.

    This endless cycle of development hell is now avoided thanks to the safety net the Netlify CLI provides.

    Further Reading

  • When building any application, the last thing on any developer's mind is how a build will impact the environment. After all, an application relies on some form of hosting infrastructure - servers, databases, firewalls, switches, routers, cooling systems, etc. The efficiency of how all these pieces of hardware combined are powered to host your application never comes into question.

    We are fast becoming aware, more than ever before, that what we do day-to-day has an impact on the environment and are more inclined to take appropriate steps in changing our behaviour to reduce our carbon footprint. However, our behaviour remains unchanged when it comes to our online habits.

    Every time a website is visited, a request is made to the server to serve content to the user. This in itself utilises a nominal amount of power for a single user. But when you take hundreds or even thousands of visitors into consideration, the amount of power required builds up exponentially causing more carbon dioxide to be emitted. Of course, this all depends on how efficiently you build your website. For example, reducing unnecessary calls to the database and effective use of caching.

    From a digital standpoint, energy is perceived as an infinite commodity with little regard for its carbon footprint.

    Interestingly, Microsoft experimented with developing a self-sufficient underwater shipping container-size data centre on the seafloor near Scotland’s Orkney Islands in a two-year trial that ended in 2020. It proved that underwater data centres are feasible, environmentally and economically practical. The consistently cool temperature of the sea allows data centres to be energy-efficient without tapping into freshwater resources. An impressive feat of engineering.

    Microsoft Underwater Data Center near Scotland’s Orkney Islands

    Analysing Site Emissions

    I thought it would be a fun exercise to see how my website fairs from an environmental perspective. It's probably not the most ideal time to carry this out as I've only just recently rebuilt my site. But here we go...

    There are two websites I am using to analyse how my website fairs from an environment perspective:

    These tools are separate entities and use their own algorithms to determine how environmentally friendly a website and even though they both use datasets provided by The Green Web Foundation, it is expected to see differences in the numbers both these tools report.

    Website Carbon Calculator

    Website Carbon Calculator states my website is 95% cleaner than other web pages tested, produces 0.05kg of CO2 whenever someone visits a page and (most importantly) running on sustainable energy. All good!

    Website Carbon Calculator Results

    The full report can be seen here.

    Digital Beacon

    Digital Beacon allows me to delve further into more granular stats on how the size of specific page elements has an effect on CO2 emissions on my website, such as JavaScript, images and third-party assets.

    Digital Beacon Results

    This tool has rated my website as "amazing" when it comes to its carbon footprint. The page breakdown report highlights there is still room for improvement in the Script and Image area.

    The full report can be seen here.

    Examples of Low Carbon Websites

    Lowwwcarbon.com showcases low-carbon web design and development. I am hoping, in time, more websites will be submitted and added to their list as great examples that sustainable development doesn't mean you're limited to how you develop websites.

    I am proud to have this very website added to the list. It's all the more reason to focus on ensuring my website is climate friendly on an ongoing basis.

    Lowwwcarbon.com - www.surinderbhomra.com submission

    Final Thoughts

    There are well over 1 billion websites in the world. Just imagine for a moment if even 0.01% of these websites took pre-emptive steps on an ongoing basis to ensure their pages are loading efficiently, this would make quite the difference in combatting CO2 emissions. I'm not stating that this alone will single-handedly combat climate change, but it'll be a start.

    Not all hosting companies will have the investment to make their infrastructure environmentally friendly and trial alternatives on a similar scale as Microsoft has done. We as developers need to change our mindset on how we build our applications and have the environmental implications at the forefront of our minds. It's all too easy to develop things out of thin air and see results. The change will have to start at code level.

    Further Reading

  • I’ve recently updated my website from the ground up (something I will write in greater detail in a future post) and when it came to releasing all changes to Netlify, I was greeted by the following error in the build log:

    7:39:29 PM: $ gatsby build
    7:39:30 PM: error Gatsby requires Node.js 14.15.0 or higher (you have v12.18.0).
    7:39:30 PM: Upgrade Node to the latest stable release: https://gatsby.dev/upgrading-node-js
    

    Based on the error, it appears that the Node version installed on my machine is older than what Netlify requires... In fact, I was surprised to discover that it was very old. So I updated Node on my local environment as well as all of the NPM packages for my website.

    I now needed to ensure my website hosted in Netlify was using the same versions.

    The quickest way to update Node and NPM versions is to add the following environment variables to your site:

    NODE_VERSION = "14.15.0"
    NPM_VERSION = "8.5.5"
    

    You can also set the Node and NPM versions by adding a netlify.toml file to the root of your website project before committing your build to Netlify:

    [build.environment]
        NODE_VERSION = "14.15.0"
        NPM_VERSION = "8.5.5" 
    
  • One of the first steps in integrating Apple Pay is to check the domain against the Developer Account. For each merchant ID you've registered, you'll need to upload a domain-verification file. This involves placing the verification the following path for your domain:

    https://[DOMAIN_NAME]/.well-known/apple-developer-merchantid-domain-association
    

    As you can see, the "apple-developer-merchantid-domain-association" file does not contain an extension, which will cause issues in IIS permitting access to serve this file. From what I've read online, adding an "application/octet-stream" MIME type to your site should resolve the issue:

    IIS Mime Type - Octet Stream

    In my case, this didn't work. Plus I didn't like the idea of adding a MIME type purely for the purpose of accepting extension-less paths. Instead, I decided to go down the URL Rewriting route, where I would add the "apple-developer-merchantid-domain-association" file with a ".txt" extension to the "/.well-known" directory and then rewrite this path within the applications web.config file.

    <rewrite>
    	<rules>
    		<rule name="Apply Pay" stopProcessing="true">
    		  <match url=".well-known/apple-developer-merchantid-domain-association" />
    		  <action type="Rewrite" url=".well-known/apple-developer-merchantid-domain-association.txt" appendQueryString="false" />
    		</rule>
    	</rules>
    </rewrite>
    

    Through this rewrite rule, the request path is is changed internally and the URL of the request displayed in the address bar (without the extension) stays the same. Now Apple can verify the site.

  • I normally like my last blog post of the year to end with a year in review. In light of being in Tier 4 local restrictions, there isn't much to do during the festive period unlike previous years. So I have decided to use this time to tinker around with various tech-stacks and work my own site to keep me busy.

    Whilst making some efficiency improvements under-the-hood to optimise my sites build and loading times, I randomly decided to check the security headers on securityheaders.com and to my surprise received a grade 'D'. When my site previously ran on the .NET Framework, I managed to secure things down to get graded an 'A'. I guess one of my misconceptions on moving to a statically-generated site is there isn't a need. How wrong I was.

    A dev.to post by Matt Nield explains why static sites need basic security headers in place:

    As you add external services for customer reviews, contact forms, and eCommerce integration etc., we increase the number of possible vulnerabilities of the application. It may be true that your core data is on accessed when you rebuild your application, but all of those other features added can leave you, your customers, and your organisation exposed. Being frank, even if you don't add external services there is a risk. This risk is easily reduced using some basic security headers.

    Setting security headers on a Netlify hosted site couldn't be simpler. If like me, your site is built using GatsbyJS, you simply need to add a _headers file in the /static directory containing the following header rules:

    /*
    X-Frame-Options: DENY
    X-XSS-Protection: 1; mode=block
    Referrer-Policy: no-referrer
    X-Content-Type-Options: nosniff
    Content-Security-Policy: base-uri 'self'; default-src 'self' https: ; script-src 'self' 'unsafe-inline' https: ; style-src 'self' 'unsafe-inline' https: blob: ; object-src 'none'; form-action 'self' https://*.twitter.com; font-src 'self' data: https: ; connect-src 'self' https: ; img-src 'self' data: https: ;
    Feature-Policy: geolocation 'self'; midi 'self'; sync-xhr 'self'; microphone 'self'; camera 'self'; magnetometer 'self'; gyroscope 'self'; fullscreen 'self'; payment 'self'
    

    When adding a "Content-Security-Policy" header be sure to thoroughly re-check your site as you may need to whitelist resources that are loaded from a different origin. For example, I had to make some tweaks specifically to the "Content-Security-Policy" to allow embedded Tweets to render correctly.

    My site is now back to its 'A' grade glory!

    Useful Links

  • I’ll get right to it. Should I be making the move to a headless content management platform? I am no stranger to the Headless CMS sector after the many years of being involved in using different providers for client-based projects, so I am well-versed on the technology to make a judgement. But any form of judgment gets thrown out the window when making a consideration from a personal perspective.

    Making the move to a Headless CMS is something I’ve been thinking for quite some time now as it would streamline my website development considerably. I can see my web application build footprint being smaller compared to how it is at the moment by running on Kentico 12.

    This website has been running on Kentico CMS for around 6 years ever since I was first introduced to the Kentico platform, which gave me a very good reason to move from BlogEngine. I wanted my web presence to be more than just a blog that would give me the flexibility to be something more. I do not like the idea of being restricted to just one feature-base.

    As great as it is running my website on Kentico CMS, it’s too big of an application for my needs. Afterall, I am just using the content-management functionality and none of the other great features the platform offers, so it’s good time to start thinking of downsizing and reduce running costs. Headless seems the most suitable option right?

    I won’t be going into detail on what headless is. The internet contains information on the subject matter detailed in a more digestable manner over the years suitable for varied levels of technical expertise. “Headless CMS” is the industry buzz-word that clients are aware of. You can also take a read of a Medium post I wrote last year about one type of headless platform - Kentico Cloud (now named Kontent) and the market.

    So why haven’t I made the move to Headless CMS? I think it comes down to following factors:

    • Pricing
    • Infrastructure and stability
    • Platform changes
    • Trust

    Pricing

    First and foremost, it’s the price. I am aware that all Headless CMS providers have a free or starter tier, each with their own defined limitations whether that be the number of API requests or content limits. I like to look into the future and see where my online presence may take me and at some point, I would need to consider the cost of a paid tier. How does that fit into my yearly hosting costs?

    At the moment, I am paying £80 yearly. If I were to jump onto headless, the cheapest price I’ve seen equates to £66 a year and I haven’t factored in hosting costs yet. I could get away with low-cost hosting as my web build will be on a smaller scale and I plan my next build using the .NET Core framework.

    If I had my own company or product where I was looking for ways to deliver content across multiple channels, I would use headless in a heartbeat. I could justify the cost as I know I would be getting my money’s worth and if I were to find myself exceeding a tiers limit I could just move onto the next.

    Infrastructure and Stability

    Infrastructure and stability of a headless service all come down to how much you’re willing to pay. The API uptime is the most important part after the platform features. I’ve noticed that some starter and free tiers do not state an uptime, for example, 99.9% or 99.5%. Depending on the technology stack, this might not be an issue where a constant connection to the API is required, for example, Gatsby.

    I do think in this area where Headless CMS wins, is the failover and backup procedures in place. They would more than likely surpass the infrastructure in place from a personally hosted and managed site.

    Platform Changes

    It’s natural for improvements and changes to be made throughout the lifespan of a product. The only thing with headless you don’t have a choice on whether you want those changes as what works for one person may not necessarily work for another. You are locked into the release cycle.

    I remember back in the early days when Headless CMS’s started to gain traction, releases were being made in such a quick turnaround at the expense of the editors who had to quickly adapt to the subtle changes in features. The good thing now is the dust has settled as the platform has gotten to the point of maturity.

    The one area I still have difficulty getting over is the rich-text area. Each headless CMS provider seems to have their restrictions and you never really get full control over HTML markup unless a normal text area is used. There are ways around this but some restrictions still do exist.

    Where do you as an individual fit into this lifecycle? That’s the million-dollar question. However, there is one headless platform that is very involved with feedback from their users, Kentico Kontent, where all ideas are put under consideration, voted on and (if successful) submitted into the roadmap. I haven’t seen this approach offered by other Headless CMS platforms and maybe this is something they should also do.

    Trust

    There is a trust aspect to an external provider storing your content. Data is your most valuable asset. Is there any chance in the service being discontinued at some-point? If I am being totally honest to myself, I don’t think this is a valid point as long as the chosen platform has proven it’s worth and cemented itself over a lengthy period of time. Choose the big players (in no particular order), such as:

    • Kontent
    • Contentful
    • Prismic
    • DatoCMS
    • ButterCMS

    There is also another aspect to trust that draws upon a further point I made in the previous section regarding platform changes. In the past, I’ve seen content features getting deprecated. This doesn’t break your current build, just causes you to rethink things when updating to the newer version API interface.

    Conclusion

    I think moving to a Headless CMS requires a bigger leap than I thought. I say this purely from a personal perspective. The main piece of work would be to carry out content modelling for pages, migrate all my site content and media into the new platform and apply page redirects. This is before I have made a start in developing the new site.

    I will always be in two minds on whether I should use a Headless CMS. If I wasn’t such a control-freak when it comes to every aspect of my application and content, I think I could make the move. Maybe I just need to learn to let go.

  • In light of my hosting issues over the last week, I decided it was time to take measures in ensuring all websites under my hosting provider are always backed up automatically. I generally take hosting backups offsite on an ad-hoc basis and entrust the hosting provider to keep up their end of the bargain by doing this on my behalf.

    If you are with a hosting provider (like I was previously - A2 Hosting), who talks the talk but can't actually walk the walk in regards to the service they offer, you will more than likely end up having backup woes. It's always best practice to take control of your own backups and if this can be automated, makes life so much easier!

    All Plesk panels have a "Backup Manager" area where you can action manual or scheduled backup processes. Depending on your hosting provider, the features shown in this area might be varied. Some have the option to backup straight to your Dropbox account. What we will be focusing on is remotely backing up our website data to our Synology NAS using FTP.

    Before we log into Plesk to select our Remote Backup option, we need to carry out some setup on our Synology.

    Port Forwarding for FTP and FTPS Protocols

    Most likely, your router will have a limited number of ports open to allow outside internet traffic to enter the local network. To make the most of your Synology, there is a recommended number of ports you need to open to make use of all the services.

    We are interested in opening to the following ports:

    • FTP: 21
    • FTPS: 990

    I prefer to send over any data using FTPS just for better security.

    You will have to login to your router settings to open ports. I would provide some instructions on how to do this, but every router is different. I just managed to find these settings hidden away in my own Billion router.

    Synology Setup

    Setting up FTP is pretty straight-forward. Just make sure you have administrative privileges to access the Control Panel.

    Enable FTP

    In Control Panel, go to: File services > FTP Tab.

    All we need to do here is to enable two FTP settings:

    • Enable FTP service (no encryption)
    • Enable FTP SSL/TLS encryption (FTPS)

    Synology Control Panel - Enable FTP

    The reason why I selected the "Enable FTP service (no encryption)" option is purely for initial testing purposes. If there are any issues when making a connection via FTP from a new service for the first time, I just like to ensure if a successful connection can be made via standard FTP. After my testing is done, I would disable this option.

    Create a Synology User

    I prefer to create a new user specifically for FTP connections rather than my main own account, as I have the ability to lock down access to only read and write permissions in its home directory. No Synology services or applications will be accessible.

    Synology FTP User Permissions

    The only application I allow my user to access is "FTP".

    Synology FTP User Application Permissions

    Plesk Backup Manager Setup

    FTP Configuration

    In Backup Manager, go to "Remote Storage Settings and select "FTP". Enter the following settings along with your user credentials:


    On clicking the "OK" or "Apply" button should return no errors. But if there are errors, check the logs and ensure you haven't missed any permissions for your Synology user.

    Set Backup Schedule

    Now we have set our remote storage settings, we now need to put a schedule in place to generate a backup on as often as we require. It's up to on how often you set the regularity of the backups. I've set mine to run daily at 11pm and retain these backups for a month.

    Plesk Scheduled Backup

    Make sure you set the Backup settings to store the backup in your newly created FTP storage.

    A Word To The Wise

    Just because we now have automatic backups running protecting us from any foreseen hosting issues, this doesn't mean we're all in the clear. Backups are useless to us if they don't work. I check my backups at least once a week and ensure the most recently backed up file is free from corruption and can be opened.

  • It's been a turbulent last few days at the house of A2 Hosting where not only all their Windows hosting, but also a number of Wordpress hosting (as of 23rd April) has come to a standstill. After much pressing by its customers, it has come to light that a malware related security breach caused an outage, not only in one service, but many across A2 Hosting infrastructure.

    It's now been 3 days in counting where the outage still persists. Luckily, I managed to move back to my old hosting provider after waiting 2 days patiently for some form of recovery and I'm glad I did! I truly feel sorry for the many others who are still waiting on some form of resolution. I think I managed to get out from under A2 Hosting relatively unscathed.

    This whole outage has caused me to not only reflect on my time with A2 Hosting but also hosting providers in general.

    The Lies

    If I'm honest, the days were counting down after getting infuriated by their support (lack of!) and the lies by their marketing and sales to meet my relatively simple hosting needs. I like to think I'm very scrupulous when it comes to hosting and do my due diligence... In this case, A2 managed to get one over me in that department!

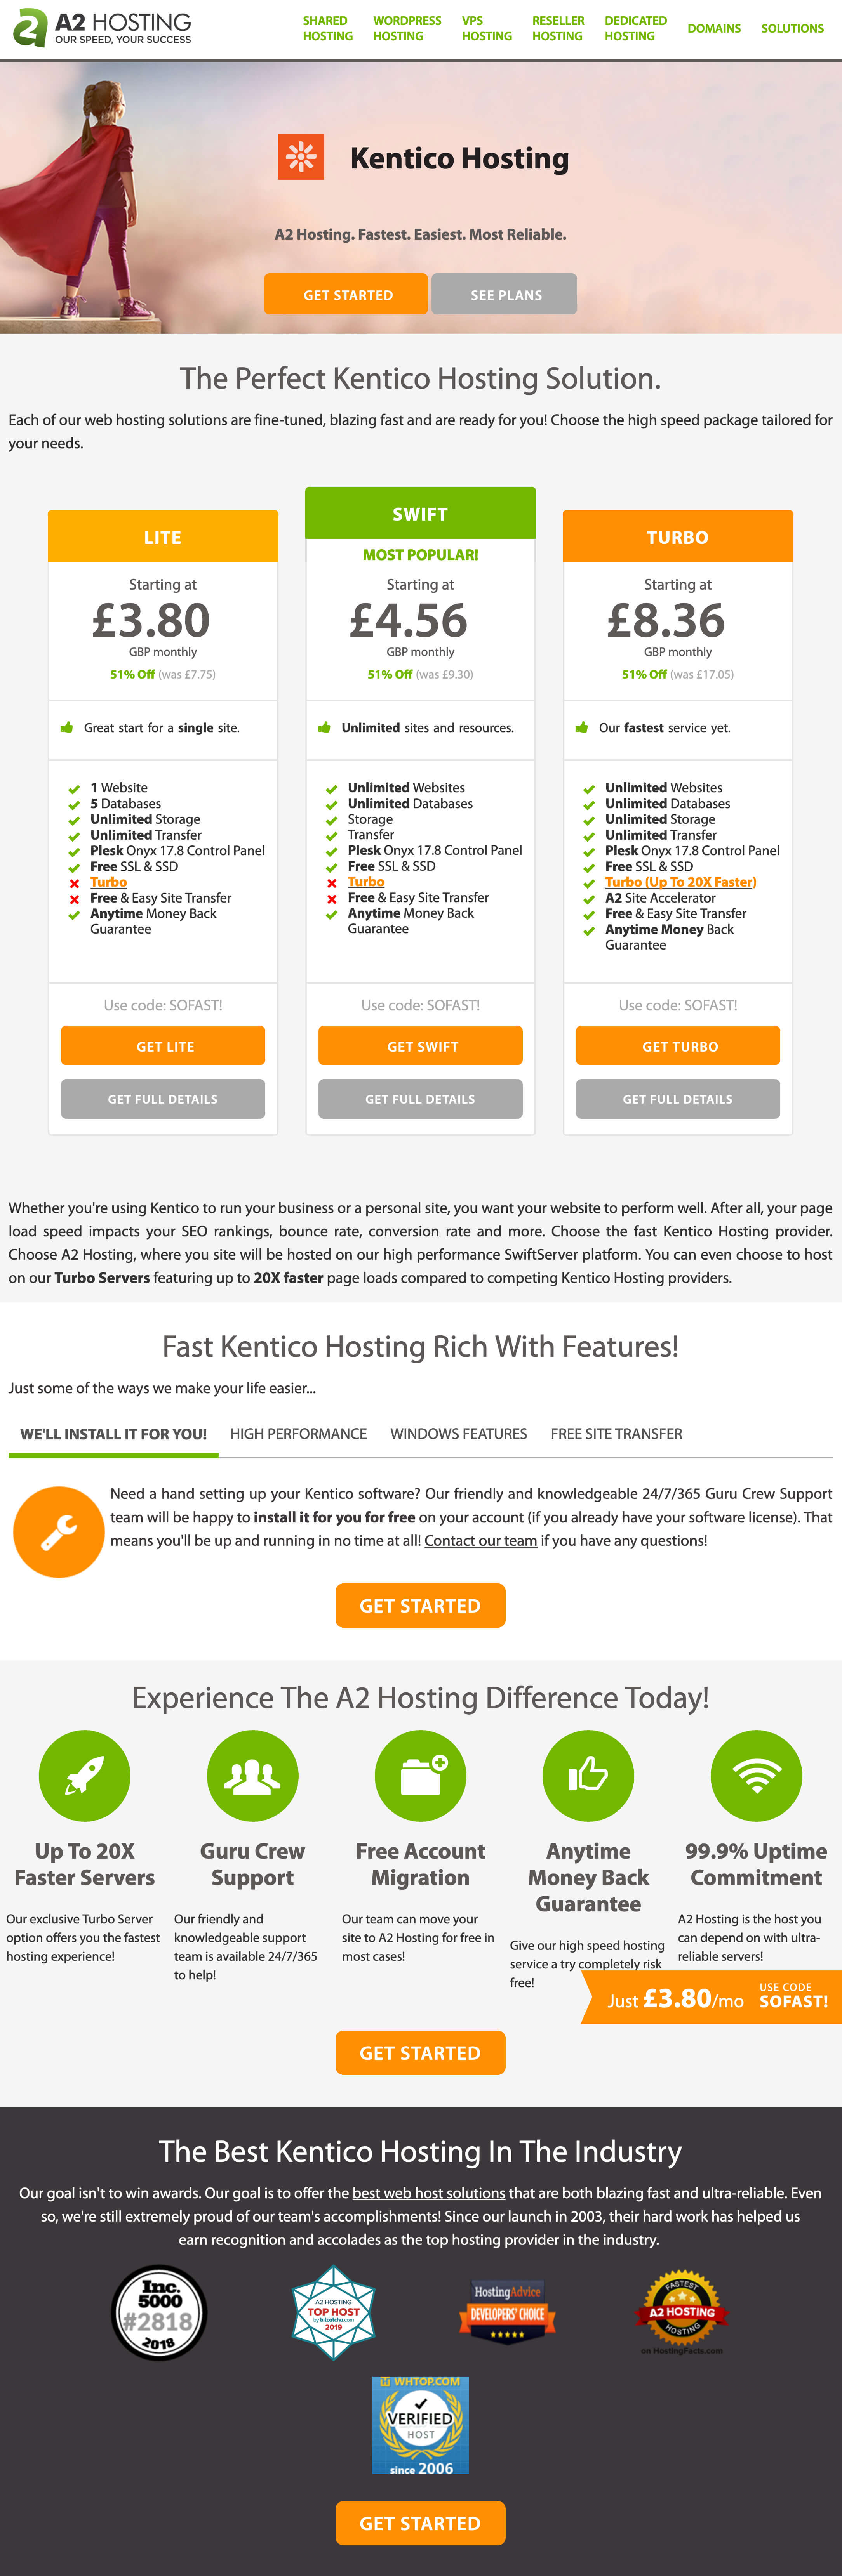
    I run a couple of sites on Kentico CMS and it was important to find a hosting company that caters for this platform due to the hardware resources required to run.

    Lo and behold...

    A2 Hosting - Best Kentico Hosting

    Judging by that page alone filled me with confidence at a reasonable price with a lot of extras thrown in. I confirmed this was the case by talking at length to the A2 sales team beforehand and was ensured any tier would meet my needs. So I opted for the mid-tier plan - Swift, costing around £125 for 2 years after some nice promotional offers.

    Knowing what I know now, I can report that the Swift plan and potentially all the other shared plans do not fit the requirements of a reasonably small Kentico site. Hosting Kentico on A2 Hosting was the bane of my life, as every so often my site would randomly timeout, with only one explanation from their support team:

    We suggest you optimize your website with help from your web developer to fix the issue.

    After politely requesting more information on the issue and also entertaining the fact I may need to up my hosting, I never really did get any adequate reason. It was always the efficiency of my website to blame.

    Don't Believe Them, Don't Trust Them

    Lack of Transparency

    In light of recent events, transparency isn't one of A2 Hostings strengths (unless when pressed upon by its many customers). When problems arise, I'd prefer to know exactly what is the root cause. Knowing this actually puts more confidence in a hosting provider. I think we all know the feeling when we're not given the full picture.

    Our minds have a habit of thinking of a worst-case scenario when we do not have the full picture.

    Honesty is the best policy!

    A2 Hosting Tweet - Transparency
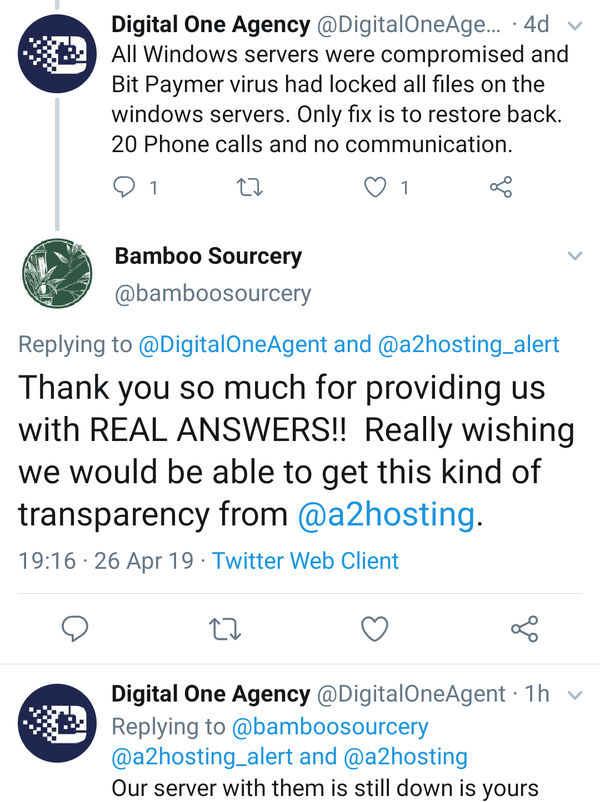
    (Example of A2 Hosting Lack of Transparency)

    99.9% Uptime Promise

    In reality, I don't expect 99.9% uptime from hosting providers as things do happen due to unforeseen circumstances. But I still expect the 98-99% range.

    A2 Hosting - 99.9%25 Uptime

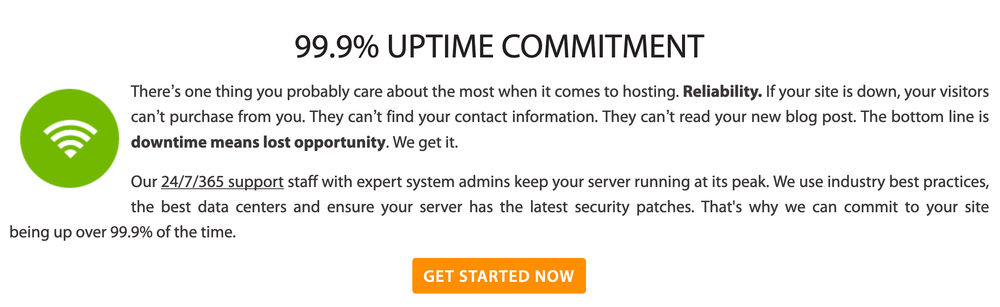
    Judging by my uptime monitoring, I have never been blessed with 99.9% uptime during my tenure (1 out of 2-year plan) at A2 Hosting. My site has always encountered timeouts and downtime. The last major outage was around 2 months ago -  amounting up to 24 hours downtime!

    Trusting Your Hosting Provider

    If your website is big or small, handing over your online presence to a third-party is a big deal. You are whole-heartedly trusting a company to house your website with tender loving care. Any downtime and slow loading times can negatively impact your client base and SEO.

    I've learnt that a hosting provider could have many 5 star reviews and still lack the infrastructure and support to back it up. In fact, this is what perplexed me about A2 Hostings many positive reviews.

    Finding quality and appropriately priced hosting is very difficult to find. There are so many options, but the hosting industry has the classic issue of quantity over quality.

    Backups

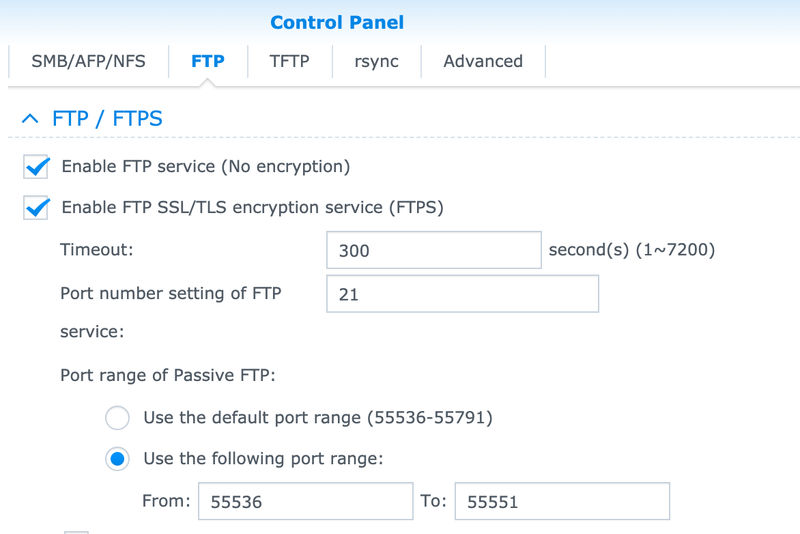
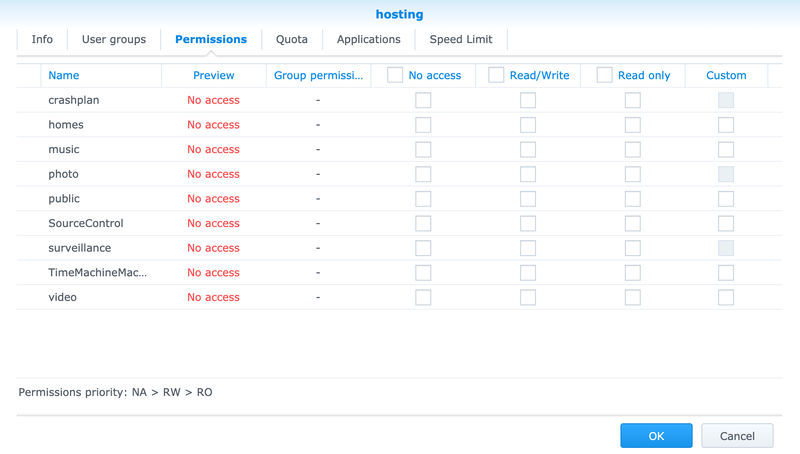
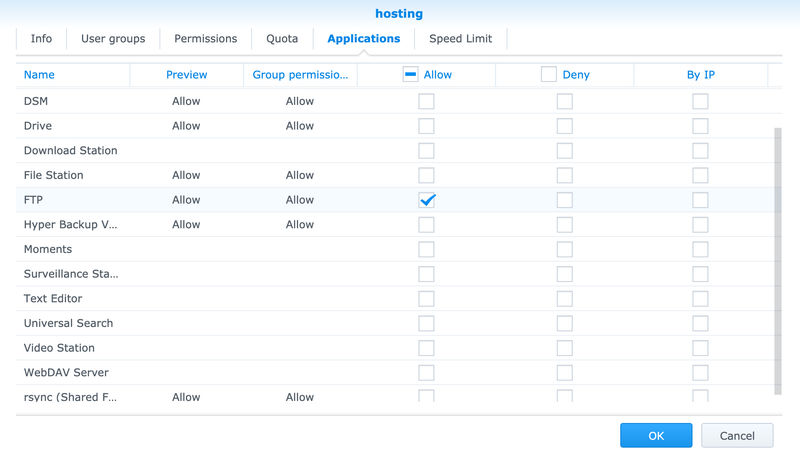
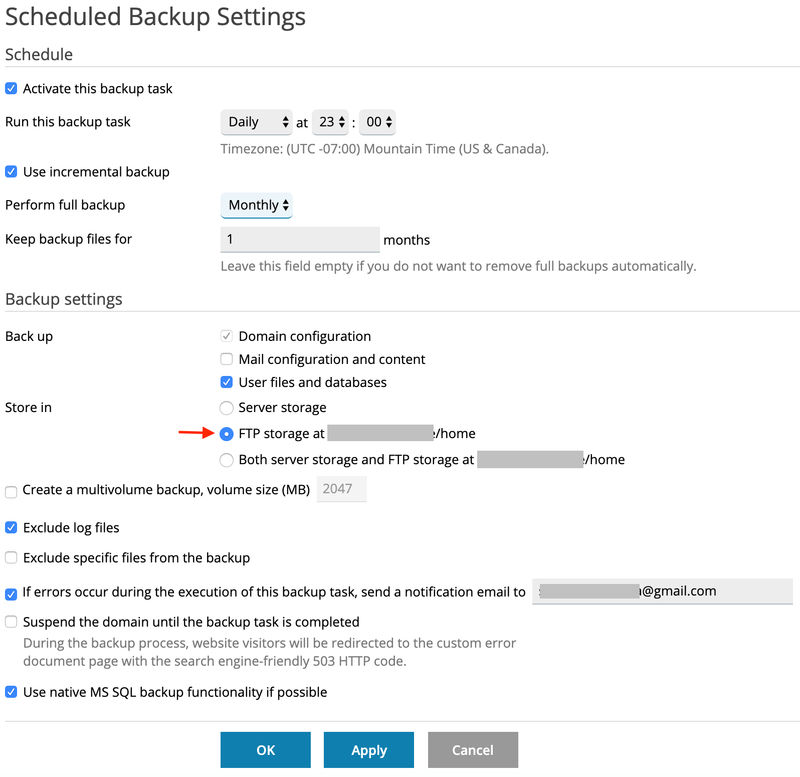
    Regardless of how good any hosting company is, I would always recommend you take suitable measures to regularly carry out offsite backups on all your sites. Yes, this can be a laborious task if you are managing many sites, but its the only way to 100% sure you can be in control.

    This was the only way I was able to move swiftly back to SoftSys Hosting and not wait on A2 Hosting to restore their services. At one point, there was a question mark over the current state of A2 Hosting's backups are in.

    Tweet - A2 Hosting Backup
    (A2 Hosting Questionable Backups)

    Moving Back To Previous Hosting

    Believe or not, I can't remember the exact reason why I left Softsys Hosting. After all, I never had any issues with them throughout the 9 years I was with them. Very accommodating bunch of guys! I think what attracted me to A2 Hosting was their shiny website, the promise of faster load times and the option to have my site hosted on UK servers.

    It's always an absolute pain having to move and set everything back up again. But thanks to Ruchir at Softsys Hosting who was very attentive in helping me during my predicament and answering all my queries, managed to assist in achieving a quick turnaround. So in total, my site was only down for just under 2 days.

    It seems quite apt that I come back to the hosting provider I call home under the same reasons to why I started using them in the first place back in 2009 when I was failed by my first ever hosting provider (Ultima Hosts). Oh, the irony!

    Conclusion

    Unfortunately, there isn't an exact science to finding the most ideal hosting provider for your budget and requirements. If you ever have any qualms regarding your current hosting provider, you might have good reason to be. Hosting should be worry and hassle free, knowing that your data is in the hands of capable people. If you have the finances to move, just do it. Hardware can be replaced, data can not. Data is a commodity!

    Take online reviews with a pinch of salt. Instead, take a look at the existing users responses through their main Twitter and status accounts. Some might even have status pages. This will hopefully give you a more unbiased view on their operation and approach to resolving past issues.


    Update - 26/04/2019

    I have asked A2 Hosting for some form of compensation, especially since I purchased 2 years up front. Awaiting their response to the exact amount. I am hoping they will add some additional compensation as a goodwill gesture for misleading on their Kentico host offering.

    Update - 27/04/2019

    As of 27/04/2019 8pm (GMT), I managed to log back into A2 Hosting Plesk Administration to get a more recent backup of my hosting. Noticed there were some database errors in the process.

    Update - 01/05/2019

    Not looking good. I think there is a very slim chance in getting any form of reimbursement from A2 Hosting as they have decided to delete my support ticket. Not "close", but actually delete. I thought this was probably a mistake and after delving into the mass of responses from many other unhappy users, it seems I am not the only one.

    Tweet - A2 Hosting Deleting Tickets

    One can only assume that A2 Hosting are wiping their hands of any form of user correspondence. There hasn't been any further considerable updates or timescales to when services will resume. I am still awaiting for the ability to carry out a proper backup.

  • This month I've been writing some blog posts on why I decided to start using Cloudflare service for my website and utilising its API to allow me to purge cached files from the Cloudflare CDN on demand. Before reading further, I highly suggest perusing those posts just to put everything into context for my reasoning into using Cloudflare as well as the C# code that interacts with the API, which I will be referencing later on within this very post.

    My intial Cloudflare integration evolves around serving media files more efficiently through a CDN and having the ability to refresh these files automatically as updates are made within the Kentico CMS. Cloudflare's CDN services can help cache your content across their large global network, moving static files closer to your visitor.

    Based on the Page Rules I configured within the Cloudflare dashboard, I am caching all media library files served through the /getmedia/ URL path into the Cloudflare CDN. The same file will be served through the CDN until the set cache limit has expired. We need to implement functionality that will add some automation to the Kentico platform to purge the cache of a specific media library file when updated.

    Add A Global Event

    I created an event handler for the updating of Media library files as I wanted to get details of the file being updated by leveraging the MediaFileInfo class to access the Update.After event.

    protected override void OnInit()
    {
        base.OnInit();
    
        MediaFileInfo.TYPEINFO.Events.Update.After += Update_After;
    }
    
    private void Update_After(object sender, ObjectEventArgs e)
    {
        MediaFileInfo fileInfo = e.Object as MediaFileInfo;
    
        GlobalEventFunctions.PurgeMediaCache(fileInfo);
    }
    

    PurgeMediaCache() Method

    The event above calls a GlobalEventFunctions.PurgeMediaCache() method that will pass the information about the changed file ready for purging. The file URL parsed to the Cloudflare.PurgeSelectedFiles() method needs to be exact and take into consideration how your instance of Kentico is serving media files. If Permanent URL's are being used the /getmedia/ URL needs to be constructed consisting of:

    • Current domain
    • File GUID
    • File Name
    • File Extension

    Otherwise, we can just use get the file path as normal to where the media file resides.

    public class GlobalEventFunctions
    {
        /// <summary>
        /// Purges a file from the Cloudflare cache.
        /// </summary>
        /// <param name="fileInfo"></param>
        public static void PurgeMediaCache(MediaFileInfo fileInfo)
        {
            bool permanentURLEnabled = SettingsKeyInfoProvider.GetBoolValue($"{SiteContext.CurrentSiteName}.CMSMediaUsePermanentURLs");
            string filePath = string.Empty;
                
            if (permanentURLEnabled)
                filePath = $"{GetCurrentDomain()}/getmedia/{fileInfo.FileGUID.ToString()}/{fileInfo.FileName}{fileInfo.FileExtension}";
            else
                filePath = $"{GetCurrentDomain()}/{fileInfo.FilePath}";
    
            try
            {
                // Get code from: https://www.surinderbhomra.com/Blog/Post/2018/11/11/Cloudflare-API-Purge-Files-By-URL-In-C
                CloudflareCacheHelper cloudflareHelper = new CloudflareCacheHelper();
    
                cloudflareHelper.PurgeSelectedFiles(new List<string> { filePath });
            }
            catch (Exception ex)
            {
                EventLogProvider.LogException("Cloudflare Purge File Cache", "CLOUDFLARE_PURGE", ex, SiteContext.CurrentSiteID, $"Purge File: {filePath}");
            }
        }
    
        /// <summary>
        /// Get domain from current http context.
        /// </summary>
        /// <returns></returns>
        private static string GetCurrentDomain()
        {
            return $"{HttpContext.Current.Request.Url.Scheme}{Uri.SchemeDelimiter}{HttpContext.Current.Request.Url.Host}{(!HttpContext.Current.Request.Url.IsDefaultPort ? $":{HttpContext.Current.Request.Url.Port}" : null)}";
        }
    }
    

    We need not consider any other scenarios, such as insert or deletion. If a file is inserted, there is nothing to purge as it's a new file that will be cached directly into in the CDN on first request and when it comes to deletion we can just wait for the cache to expire.

    What's Next?

    The integration I have detailed so far is just scratching the surface of what Cloudflare has to offer and will investigate further on pushing more content over to the CDN. One area, in particular, I am looking into is carrying out full page caching. You might be thinking why even bother as Kentico has pretty good caching mechanisms already in place?

    Well Cloudflare has a really neat feature called "Always Online", where a cached version of a page is served if on the off chance it happens to go down or requires a reboot to install key security updates. But implementing this feature requires strict Page Rules to be setup within the Cloudflare dashboard to ensure the general workings of Kentico are not effected.