
Automatically Backing Up Plesk Data To Synology
In light of my hosting issues over the last week, I decided it was time to take measures in ensuring all websites under my hosting provider are always backed up automatically. I generally take hosting backups offsite on an ad-hoc basis and entrust the hosting provider to keep up their end of the bargain by doing this on my behalf.
If you are with a hosting provider (like I was previously - A2 Hosting), who talks the talk but can't actually walk the walk in regards to the service they offer, you will more than likely end up having backup woes. It's always best practice to take control of your own backups and if this can be automated, makes life so much easier!
All Plesk panels have a "Backup Manager" area where you can action manual or scheduled backup processes. Depending on your hosting provider, the features shown in this area might be varied. Some have the option to backup straight to your Dropbox account. What we will be focusing on is remotely backing up our website data to our Synology NAS using FTP.
Before we log into Plesk to select our Remote Backup option, we need to carry out some setup on our Synology.
Port Forwarding for FTP and FTPS Protocols
Most likely, your router will have a limited number of ports open to allow outside internet traffic to enter the local network. To make the most of your Synology, there is a recommended number of ports you need to open to make use of all the services.
We are interested in opening to the following ports:
- FTP: 21
- FTPS: 990
I prefer to send over any data using FTPS just for better security.
You will have to login to your router settings to open ports. I would provide some instructions on how to do this, but every router is different. I just managed to find these settings hidden away in my own Billion router.
Synology Setup
Setting up FTP is pretty straight-forward. Just make sure you have administrative privileges to access the Control Panel.
Enable FTP
In Control Panel, go to: File services > FTP Tab.
All we need to do here is to enable two FTP settings:
- Enable FTP service (no encryption)
- Enable FTP SSL/TLS encryption (FTPS)
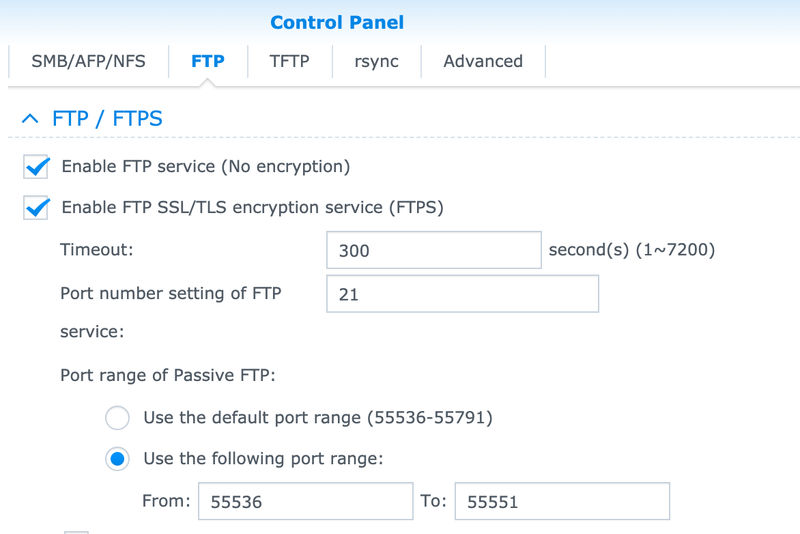
The reason why I selected the "Enable FTP service (no encryption)" option is purely for initial testing purposes. If there are any issues when making a connection via FTP from a new service for the first time, I just like to ensure if a successful connection can be made via standard FTP. After my testing is done, I would disable this option.
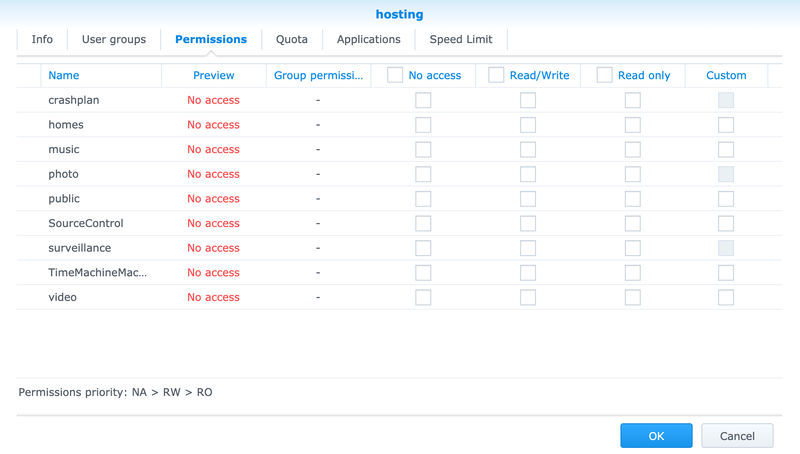
Create a Synology User
I prefer to create a new user specifically for FTP connections rather than my main own account, as I have the ability to lock down access to only read and write permissions in its home directory. No Synology services or applications will be accessible.
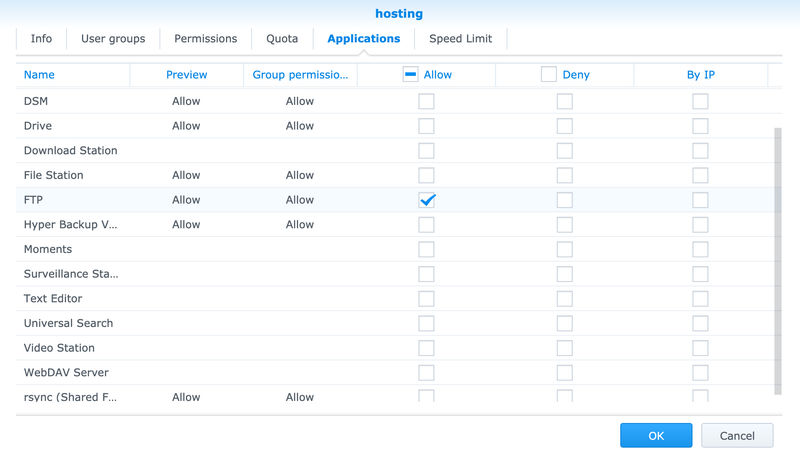
The only application I allow my user to access is "FTP".
Plesk Backup Manager Setup
FTP Configuration
In Backup Manager, go to "Remote Storage Settings and select "FTP". Enter the following settings along with your user credentials:
- FTP server hostname or IP: http://mysynology.synology.me
- Directory for backup files storage: /home
- Use passive mode: Yes
- Use FTPS: Yes
On clicking the "OK" or "Apply" button should return no errors. But if there are errors, check the logs and ensure you haven't missed any permissions for your Synology user.
Set Backup Schedule
Now we have set our remote storage settings, we now need to put a schedule in place to generate a backup on as often as we require. It's up to on how often you set the regularity of the backups. I've set mine to run daily at 11pm and retain these backups for a month.
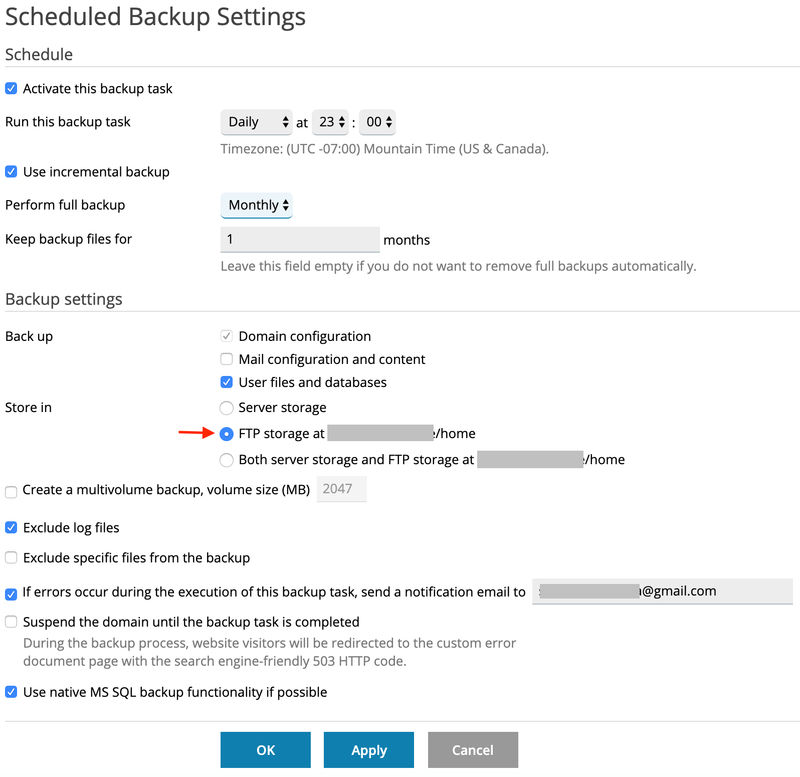
Make sure you set the Backup settings to store the backup in your newly created FTP storage.
A Word To The Wise
Just because we now have automatic backups running protecting us from any foreseen hosting issues, this doesn't mean we're all in the clear. Backups are useless to us if they don't work. I check my backups at least once a week and ensure the most recently backed up file is free from corruption and can be opened.

