Blog

Posts written in 2021.

  • Published on
    -
    5 min read

    Year In Review - 2021

    I haven't met any of the tasks I set myself based on my last year in review. But as life springs up random surprises, you see yourself shifting to a moment in time that you never thought was conceivable.

    If someone were to tell me last year that 2021 would be the year I'd find someone and finally settle down, I'd say you've been drinking too much of the finest Rioja.

    When such a shift in one's life happens, this takes utmost priority and as a result, my blogging has taken a backseat. After April things have been a little sporadic - a time when the new stage in my life kicked up a notch.

    Even though blogging this year hasn't been a priority, it's not a result of a lack of learning. I've just been focusing on learning some new life skills during this new stage in my life as well as keeping on top of new technological advances within a work environment on a daily basis.

    2021 In Words/Phrases

    Coronavirus, Covid-19, Omicron, Hubspot, Wedding, No Time To Die, Money Heist, Tailwind CSS, Prismic, Gatsby Prismic, Beard, Azure, Back The Gym, Blenheim Light Show, Camping, Abingdon Fireworks, New Family/Friends

    My Site

    Believe it or not, I have been working on an updated version by completely starting from scratch. This involved updating to the latest Gatsby framework and redoing the front-end. I came across a very good tried and tested CSS framework called Tailwind CSS.

    Tailwind is a utility CSS framework that allows for a quick turnaround in building blocks of markup to create bespoke designs based on a library of flexible predefine CSS classes. The main benefits I found so far is that it has a surprisingly minimal footprint when building for production and many sites have pre-developed HTML components you can customise and implement on your site. Only time will tell whether this is the correct approach.

    Beard Gains

    Growing some facial hair wasn't an outcome to living like a hermit during these Covid times, but a requirement from my wife. My profile picture is due for an update to reflect such a change in appearance. Even I don't recognise myself sometimes.

    Statistics

    When it comes to site statistics, I tend to lower my expectations so I'm not setting myself up for failure when it comes to checking Google Analytics. I wasn't expecting much from this year's stats due to my lack of contribution, but suffice to say I haven’t faired too badly.

    2020/2021 Comparison:

    • Users: +41.09%
    • Page Views: +45.56%
    • New Users: +42.03%
    • Bounce Rate: -3.06%
    • Search Console Total Clicks: +254%
    • Search Console Impressions: +295%
    • Search Console Page Position: -8.3%

    I'm both surprised and relieved that existing content is still getting traction resulting in more page views and users. The bounce rate has decreased a further 3.05% over last year. Out of all the statistics listed above, I believe the Google Page Position is the most important and quite disheartened that I've slipped up in this area.

    To my surprise, the site search implemented earlier this year using Algolia was getting used by visitors. This was very unexpected as the primary reason why I even added a site search is mainly for my use.

    One can only imagine how things could have been if I managed to be more consistent in the number of posts published over the year.

    Things To Look Into In 2022

    NFT and Crypto

    The main thing I want to look into further is the realms of Cryptocurrency and NFT’s. I’ve been following the likes of Dan Petty and Paul Stamatiou on Twitter and has opened my eyes to how things have moved on since I last took a brief look at this space.

    Holiday

    I haven’t been on a holiday since my trip to the Maldives in 2019 and I’m well overdue on another one - preferably abroad if I feel safe enough to do so and COVID allowing.

    Lego Ford Mustang

    I purchased a Lego Creator Series Ford Mustang near the end of last year as an early Christmas present to myself and I’m still yet to complete it. I’ve gone as far as building the underlying chassis and suspension. It doesn’t even resemble a car yet. How embarrassing. :-)

    On completion, it’ll make a fine centre-piece in my office.

    Azure

    Ever since I worked on a project at the start of the year where I was dealing with Azure Functions, deployment slots and automation I’ve been more interested in the services Azure has to offer. I’ve always stuck to the hosting related service setup and search indexing. Only ventured very little elsewhere. I’d like to keep researching in this area, especially in cognitive services.

    Git On The Command-Line

    Even though I’ve been using Git for as long as I’ve been working as a developer, it has always been via a GUI such as TortoiseGit or SourceTree. When it comes to interacting with a Git repo using the command-line, I’m not as experienced as I’d like to be when it comes to the more complex commands. In the past when I have used complex commands without a GUI, it’s been far more straightforward when compared to the comfort of a GUI where I naturally find myself when interacting with a repository.

    Twitter Bot

    For some reason, I have a huge interest in creating a Twitter bot that will carry out some form of functionality based on the contents of a tweet. At this moment in time, I have no idea what the Twitter bot will do. Once I have thought of an endearing task it can perform, the development will start.

    Final Thoughts

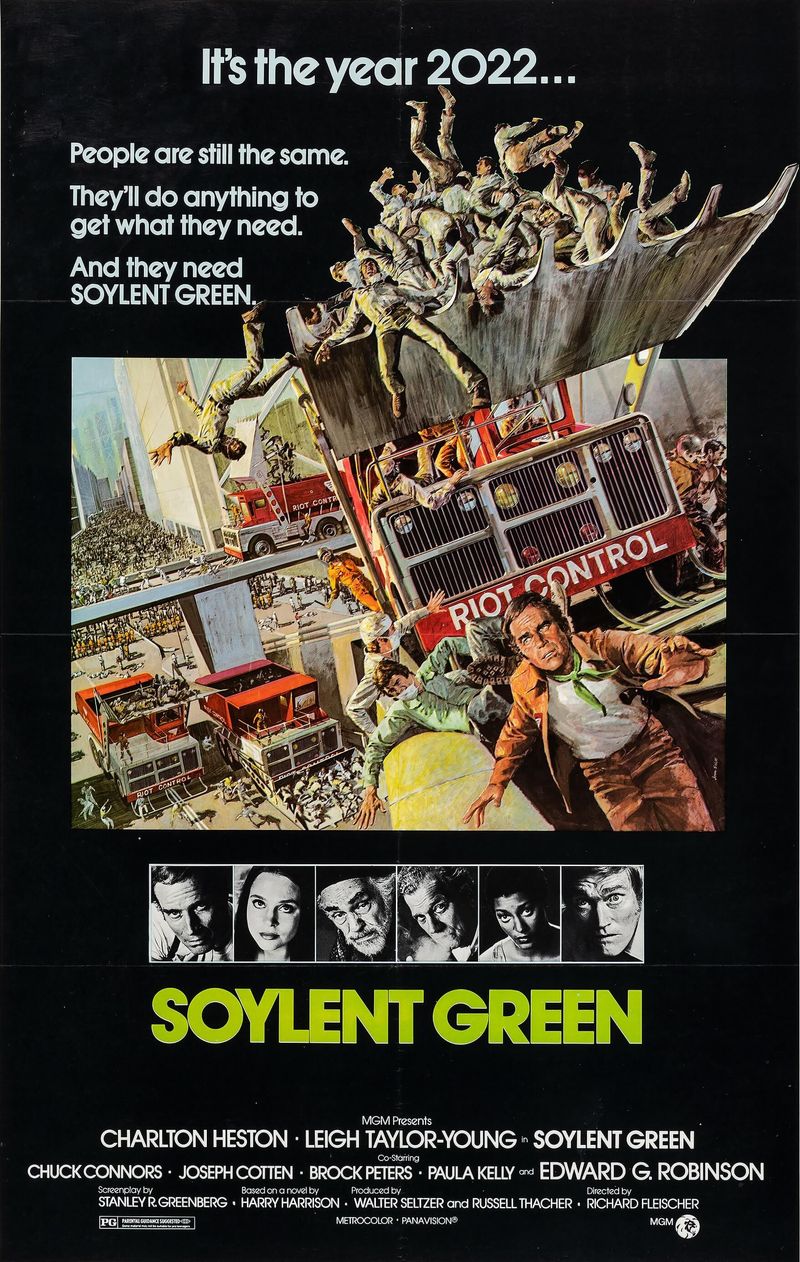
    If you thought 2021 was bad enough with the continuation of the sequel no one wanted (Covid part 2), we are just days away from entering the year 2022. The year grim events took place from the fictitious film - Soylent Green.

    Soylent Green Poster (1973)

    Luckily for me, 2021 has been a productive year filled with personal and career-based accomplishments and hoping for this to continue into the new year. But I do feel it's time I pushed myself further.

    I’d like to venture more into technologies that don’t form part of my existing day-to-day coding language or framework. This may make for more interesting blog posts. But to do this, I need to focus more over the next year and allocate time for research and writing.

  • Published on
    -
    5 min read

    Umbraco: Programmatically Add/Update A Content Page

    I decided to write this post to primarily act as a reminder to myself when dealing with programmatically creating content pages in Umbraco and expanding upon my previous post on setting a dropdownlist in code. I have been working on a piece of functionality where I needed to develop an import task to pull in content from a different CMS platform to Umbraco that encompassed the use of different field-types, such as:

    • Textbox
    • Dropdownlist
    • Media Picker
    • Content Picker

    It might just be me, but I find it difficult to find solutions to Umbraco related problems I sometimes face. This could be due to results returned in search engines reference forum posts for older versions of Umbraco that are no longer compatible in the version I'm working in (version 8).

    When storing data in the field types listed (above), I encountered issues when trying to store values in all field types except “Textbox”. The other fields either required some form of JSON structure or Udi to be parsed.

    Code

    My code contains three methods:

    1. SetPost - to create a new blog post, or update an existing blog post if one already exists.
    2. GetAuthorIdByName - uses Umbraco Examine Search Index to get back an Author document and return the Udi.
    3. GetUmbracoMedia - uses the internal Examine Search Index to return details of a file in a form that will be acceptable to store within a Media Picker content field.

    The SetPost method consists of a combination of fields required by my Blog Post document, the primary ones being:

    • Blog Post Type (blogPostType) - Dropdownlist
    • Blog Post Author (blogPostAuthor) - Content Picker
    • Image (image) - Media Picker
    • Categories (blogPostCategories) - Tags
    /// <summary>
    /// Creates or updates an existing blog post.
    /// </summary>
    /// <param name="title"></param>
    /// <param name="summary"></param>
    /// <param name="postDate"></param>
    /// <param name="type"></param>
    /// <param name="imageUrl"></param>
    /// <param name="body"></param>
    /// <param name="categories"></param>
    /// <param name="authorId"></param>
    /// <returns></returns>
    private static PublishResult SetPost(string title, 
                                        string summary, 
                                        DateTime postDate, 
                                        string type, 
                                        string imageUrl, 
                                        string body, 
                                        List<string> categories = null, 
                                        string authorId = "")
    {
        PublishResult publishResult = null;
        IContentService contentService = Current.Services.ContentService;
        ISearcher searchIndex = ExamineUtility.GetIndex().GetSearcher();
    
        // Get blog post by it's page title.
        ISearchResult blogPostSearchItem = searchIndex.CreateQuery()
                                        .Field("pageTitle", title.TrimEnd())
                                        .And()
                                        .NodeTypeAlias("blogPost")
                                        .Execute(1)
                                        .FirstOrDefault();
    
        bool existingBlogPost = blogPostSearchItem != null;
    
        // Get the parent section where the new blog post will reside, in this case Blog Index.
        IContent blogIndex = contentService.GetPagedChildren(1099, 0, 1, out _).FirstOrDefault();
    
        if (blogIndex != null)
        {
            IContent blogPostContent;
    
            // If blog post doesn't already exist, then create a new node, otherwise retrieve existing node by ID to update.
            if (!existingBlogPost)
                blogPostContent = contentService.CreateAndSave(title.TrimEnd(), blogIndex.Id, "blogPost");
            else
                blogPostContent = contentService.GetById(int.Parse(blogPostSearchItem.Id));
    
            if (!string.IsNullOrEmpty(title))
                blogPostContent.SetValue("pageTitle", title.TrimEnd());
    
            if (!string.IsNullOrEmpty(summary))
                blogPostContent.SetValue("pageSummary", summary);
    
            if (!string.IsNullOrEmpty(body))
                blogPostContent.SetValue("body", body);
                    
            if (postDate != DateTime.MinValue)
                blogPostContent.SetValue("blogPostDate", postDate);
    
            // Set Dropdownlist field.
            if (!string.IsNullOrEmpty(type))
                blogPostContent.SetValue("blogPostType", JsonConvert.SerializeObject(new[] { type }));
    
            // Set Content-picker field by parsing a "Udi". Reference to an Author page. 
            if (authorId != string.Empty)
                blogPostContent.SetValue("blogPostAuthor", authorId);
    
            // Set Media-picker field.
            if (imageUrl != string.Empty)
            {
                string umbracoMedia = GetUmbracoMedia(imageUrl);
    
                // A stringified JSON object is required to set a Media-picker field.
                if (umbracoMedia != string.Empty)
                    blogPostContent.SetValue("image",  umbracoMedia);
            }    
    
            // Set tags.
            if (categories?.Count > 0)
                blogPostContent.AssignTags("blogPostCategories", categories);
    
            publishResult = contentService.SaveAndPublish(blogPostContent);
        }
    
        return publishResult;
    }
    
    /// <summary>
    /// Gets UDI of an author by fullname.
    /// </summary>
    /// <param name="fullName"></param>
    /// <returns></returns>
    private static string GetAuthorIdByName(string fullName)
    {
        if (!string.IsNullOrEmpty(fullName))
        {
            ISearcher searchIndex = ExamineUtility.GetIndex().GetSearcher();
    
            ISearchResult authorSearchItem = searchIndex.CreateQuery()
                                            .Field("nodeName", fullName)
                                            .And()
                                            .NodeTypeAlias("author")
                                            .Execute(1)
                                            .FirstOrDefault();
    
            if (authorSearchItem != null)
            {
                UmbracoHelper umbracoHelper = Umbraco.Web.Composing.Current.UmbracoHelper;
                return Udi.Create(Constants.UdiEntityType.Document, umbracoHelper.Content(authorSearchItem.Id).Key).ToString();
            }
        }
    
        return string.Empty;
    }
    
    /// <summary>
    /// Gets the umbracoFile of a media item by filename.
    /// </summary>
    /// <param name="fileName"></param>
    /// <returns></returns>
    private static string GetUmbracoMedia(string fileName)
    {
        if (!string.IsNullOrEmpty(fileName))
        {
            ISearcher searchIndex = ExamineUtility.GetIndex("InternalIndex").GetSearcher();
    
            ISearchResult imageSearchItem = searchIndex.CreateQuery()
                                            .Field("umbracoFileSrc", fileName)
                                            .Execute(1)
                                            .FirstOrDefault();
    
            if (imageSearchItem != null)
            {
                List<Dictionary<string, string>> imageData = new List<Dictionary<string, string>> {
                        new Dictionary<string, string>() {
                            { "key", Guid.NewGuid().ToString() },
                            { "mediaKey", imageSearchItem.AllValues["__Key"].FirstOrDefault().ToString() },
                            { "crops", null },
                            { "focalPoint", null }
                    }
                };
    
                return JsonConvert.SerializeObject(imageData);
            }
        }
    
        return string.Empty;
    }
    

    Usage Example - Iterating Through A Dataset

    In this example, I'm iterating through a dataset of posts and parsing the field value to each parameter of the SetPost method.

    ...
    ...
    ...
    SqlDataReader reader = sqlCmd.ExecuteReader();
    
    if (reader.HasRows)
    {
        while (reader.Read())
        {
            SetPost(reader["BlogPostTitle"].ToString(),
                    reader["BlogPostSummary"].ToString(),
                    DateTime.Parse(reader["BlogPostDate"].ToString()),
                    reader["BlogPostType"].ToString(),
                    reader["BlogPostImage"].ToString(),
                    reader["BlogPostBody"].ToString(),
                    new List<string>
                    {
                            "Category 1",
                            "Category 2",
                            "Category 3"
                    },
                    GetAuthorIdByName(reader["BlogAuthorName"].ToString()));
        }
    }
    ...
    ...
    ...
    

    Use of Umbraco Examine Search

    One thing to notice is that when I’m retrieving the parent page to where the new page will reside or checking for a page or media file, Umbraco Examine Search Index is used. I find querying the search index is the most efficient way to return data without consistently hitting the database - ideal for when carrying out a repetitive task like an import.

    In my code samples, I'm using a custom ExamineUtility class to retrieve the search index in a more condensed and tidy manner:

    public class ExamineUtility
    {
        /// <summary>
        /// Get Examine search index.
        /// </summary>
        /// <param name="defaultIndexName"></param>
        /// <returns></returns>
        public static IIndex GetIndex(string defaultIndexName = "ExternalIndex")
        {
            if (!ExamineManager.Instance.TryGetIndex(defaultIndexName, out IIndex index) || !(index is IUmbracoIndex))
                throw new Exception("Examine Search Index could not be found.");
    
            return index;
        }
    }
    

    Conclusion

    Hopefully, the code I have demonstrated in this post will give a clearer idea on how to programmatically work with content pages using a combination of different field types. For further code samples on working with different field types, take a look at the "Built-in Umbraco Property Editors" documentation.

  • After working on all things Hubspot over the last year whether that involved building and configuring site instances to developing API integrations, I have seemed to have missed out on CMS development-related projects. Most recently, I have been involved in an Umbraco site build where pages needed to be dynamically created via an external API.

    Programmatically creating CMS pages is quite a straight-forward job as all one needs to do is:

    • Select the parent node your dynamically created page needs to reside
    • Check the parent exists
    • Create page and set field values
    • Publish

    From past experience when passing values to page fields, it's been simple as passing a single value based on the field type. For example:

    myNewPage.SetValue("pageTitle", "Hello World");
    myNewPage.SetValue("bodyContent", "<p>Lorem ipsum dolor sit amet, consectetur adipiscing elit.</p>");
    myNewPage.SetValue("hasExpired", true);
    myNewPage.SetValue("price", 9.99M);
    

    Umbraco has something completely different in mind if you plan on setting the value of type "Dropdown". Simply sending a single value will not work even though it is accepted during runtime. You will need to send a value as a Json array:

    string type = "Permanent";
    myNewPage.SetValue("jobType", JsonConvert.SerializeObject(new[] { type }));
    

    This is approach is required regardless of whether you've set the "Dropdown" field type in Umbraco as single or multiple choice.

  • Published on
    -
    1 min read

    Umbraco: Excessive Logging Causing Socket Timeout

    Ever since a Ucommerce site built in Umbraco went live, the uptime monitoring system would send a notification every day or so to report the site has gone down.

    There isn't any reason for this to happen as the site in question wasn't getting enough visitors a day to warrant such a service disruption. It was a new online presence. In addition, the hosting architecture can handle such an influx of visitors with ease should such a scenario arise.

    Something random is happening at application level causing the site to timeout. Naturally, the first place to check when there are any application problems is the event log. No errors were being flagged. Just pages and pages of "Information" level entries, which are of little use. This didn't seem right and decided to check where the log files are stored within the '/App_Data/Logs' directory and just as well I did. I was greeted by many log files totalling over 3GB in size, with the current day log measuring at 587MB and increasing.

    Appending new lines of text to an already large text file is bound to have an impact on site performance, especially when it's happening at such regular intervals. I needed to streamline what gets logged. I have no interest in "Information" log entries. To do this, the following setting in the serilog.config file found in the "/config" director needed to be updated:

    <add key="serilog:write-to:File.restrictedToMinimumLevel" value="Warning" />
    

    Previously, this setting is set to "Debug" which logs all site activity. Once this was updated, the socket timeout issue was resolved.

  • Published on
    -
    4 min read

    Azure Function: 404 Page Checker

    Sometimes the simplest piece of development can be the most rewarding and I think my Azure Function that checks for broken links on a nightly basis is one of those things. The Azure Function reads from a list of links from a database table and carries out a check to determine if a 200 response is returned. If not, the link will be logged and sent to a user by email using the Sendgrid API.

    Scenario

    I was working on a project that takes a list of products from an API and stores them in a Hubspot HubDB table. This table contained all product information and the expected URL to a page. All the CMS pages had to be created manually and assigned the URL as stored in the table, which in turn would allow the page to be populated with product data.

    As you can expect, the disadvantage of manually created pages is that a URL change in the HubDB table will result in a broken page. Not ideal! In this case, the likelihood of a URL being changed is rare. All I needed was a checker to ensure I was made aware on the odd occasion where a link to the product page could be broken.

    I won't go into any further detail but rest assured, there was an entirely legitimate reason for this approach in the grand scheme of the project.

    Azure Function

    I have modified my original code purely for simplification.

    using System;
    using System.Collections.Generic;
    using System.Net;
    using System.Text;
    using System.Threading.Tasks;
    using Microsoft.Azure.WebJobs;
    using Microsoft.Extensions.Logging;
    using SendGrid;
    using SendGrid.Helpers.Mail;
    
    namespace ProductsSyncApp
    {
      public static class ProductLinkChecker
      {
        [FunctionName("ProductLinkChecker")]
        public static void Run([TimerTrigger("%ProductLinkCheckerCronTime%"
          #if DEBUG
          , RunOnStartup=true
          #endif
          )]TimerInfo myTimer, ILogger log)
        {
          log.LogInformation($"Product Link Checker started at: {DateTime.Now:G}");
    
          #region Iterate through all product links and output the ones that return 404.
    
          List<string> brokenProductLinks = new List<string>();
    
          foreach (string link in GetProductLinks())
          {
            if (!IsEndpointAvailable(link))
              brokenProductLinks.Add(link);
          }
    
          #endregion
    
          #region Send Email
    
          if (brokenProductLinks.Count > 0)
            SendEmail(Environment.GetEnvironmentVariable("Sendgrid.FromEmailAddress"), Environment.GetEnvironmentVariable("Sendgrid.ToAddress"), "www.contoso.com - Broken Link Report", EmailBody(brokenProductLinks));
    
          #endregion
    
          log.LogInformation($"Product Link Checker ended at: {DateTime.Now:G}");
        }
    
        /// <summary>
        /// Get list of a product links.
        /// This would come from a datasource somewhere containing a list of correctly expected URL's.
        /// </summary>
        /// <returns></returns>
        private static List<string> GetProductLinks()
        {
          return new List<string>
          {
            "https://www.contoso.com/product/brokenlink1",
            "https://www.contoso.com/product/brokenlink2",
            "https://www.contoso.com/product/brokenlink3",
          };
        }
    
        /// <summary>
        /// Checks if a URL endpoint is available.
        /// </summary>
        /// <param name="url"></param>
        /// <returns></returns>
        private static bool IsEndpointAvailable(string url)
        {
          try
          {
            HttpWebRequest request = (HttpWebRequest)WebRequest.Create(url);
    
            using HttpWebResponse response = (HttpWebResponse)request.GetResponse();
    
            if (response.StatusCode == HttpStatusCode.OK)
              return true;
    
            return false;
          }
          catch
          {
            return false;
          }
        }
    
        /// <summary>
        /// Create the email body.
        /// </summary>
        /// <param name="brokenLinks"></param>
        /// <returns></returns>
        private static string EmailBody(List<string> brokenLinks)
        {
          StringBuilder body = new StringBuilder();
    
          body.Append("<p>To whom it may concern,</p>");
          body.Append("<p>The following product URL's are broken:");
    
          body.Append("<ul>");
    
          foreach (string link in brokenLinks)
            body.Append($"<li>{link}</li>");
    
          body.Append("</ul>");
    
          body.Append("<p>Many thanks.</p>");
    
          return body.ToString();
        }
    
        /// <summary>
        /// Send email through SendGrid.
        /// </summary>
        /// <param name="fromAddress"></param>
        /// <param name="toAddress"></param>
        /// <param name="subject"></param>
        /// <param name="body"></param>
        /// <returns></returns>
        private static Response SendEmail(string fromAddress, string toAddress, string subject, string body)
        {
          SendGridClient client = new SendGridClient(Environment.GetEnvironmentVariable("SendGrid.ApiKey"));
    
          SendGridMessage sendGridMessage = new SendGridMessage
          {
            From = new EmailAddress(fromAddress, "Product Link Report"),
          };
    
          sendGridMessage.AddTo(toAddress);
          sendGridMessage.SetSubject(subject);
          sendGridMessage.AddContent("text/html", body);
    
          return Task.Run(() => client.SendEmailAsync(sendGridMessage)).Result;
        }
      }
    }
    

    Here's a rundown on what is happening:

    1. A list of links is returned from the GetProductLinks() method. This will contain a list of correct links that should be accessible on the website.
    2. Loop through all the links and carry out a check against the IsEndpointAvailable() method. This method carries out a simple check to see if the link returns a 200 response. If not, it'll be marked as broken.
    3. Add any link marked as broken to the brokenProductLinks collection.
    4. If there are broken links, send an email handled by SendGrid.

    As you can see, the code itself is very simple and the only thing that needs to be customised for your use is the GetProductLinks method, which will need to output a list of expected links that a site should contain for cross-referencing.

    Email Send Out

    When using Azure functions, you can't use the standard .NET approach to send emails and Microsoft recommends that an authenticated SMTP relay service that reduces the likelihood of email providers rejecting the message. More insight into this can be found in the following StackOverflow post - Not able to connect to smtp from Azure Cloud Service.

    When it comes to SMTP relay services, SendGrid comes up favourably and being someone who uses it in their current workplace, it was my natural inclination to make use of it in my Azure Function. Plus, they've made things easy by providing a Nuget package to allow direct access to their Web API v3 endpoints.

  • Published on
    -
    1 min read

    Hubspot CMS for Marketers Certified

    Since around September last year, I've been involved in a lot of Hubspot projects at my place of work - Syndicut. It's the latest edition to the numerous other platforms that are offered to clients.

    The approach to developing websites in Hubspot is not something I'm used to coming from a programming background where you build everything custom using some form of server-side language. But I was surprised by what you can achieve within the platform.

    Having spent months building sites using the Hubspot Markup Language (HUBL), utilising a lot of the powerful marketing features and using the API to build a custom .NET Hubspot Connector, I thought it was time to attempt a certification focusing on the CMS aspect of Hubspot.

    There are two CMS certifications:

    1. Hubspot CMS for Marketers
    2. Hubspot CMS for Developers

    I decided to tackle the "CMS for Marketers" certification first as this mostly covers the theory aspect on how you use Hubspot to create a user-friendly, high-performing website and leveraging that with Hubspot CRM. These are the areas you can get quite shielded from if you're purely just developing in pages and modules. I thought it would be beneficial to expose myself from a marketing standpoint to get an insight into how my development forms part of the bigger picture.

    I'm happy to report I am now Hubspot CMS for Marketers certified.

    Hubspot CMS for Marketers Certification

  • On my UniFi Dream Machine, I have set up a guest wireless network for those who come to my house and need to use the Internet. I've done this across all routers I've ever purchased, as I prefer to use the main non-guest wireless access point (WAP) just for me as I have a very secure password that I rather not share with anyone.

    It only occurred to me a few days ago that my reason for having a guest WAP is flawed. After all, the only difference between the personal and guest WAP's is a throw-away password I change regularly. There is no beneficial security in that. It is time to make good use of UniFi’s Guest Control settings and prevent access to internal network devices. I have a very simple network setup and the only two network devices I want to block access to is my Synology NAS and IP Security Camera.

    UniFi’s Guest Control settings do a lot of the grunt work out the box and is pretty effortless to set up. Within the UniFi controller (based on my own UniFi Dream Machine), the following options are available to you:

    1. Guest Network: Create a new wireless network with its own SSID and password.
    2. Guest User Group: Set download/upload bandwidth limitations that can be attached to the Guest Network.
    3. Guest Portal: A custom interface can be created where a guest will be served a webpage to enter a password to access the wireless network - much like what you'd experience when using the internet at an airport or hotel. UniFi gives you enough creative control to make the portal interface look very professional. You  can expire the connection by a set number of hours.
    4. Guest Control: Limit access to devices within the local network via IP address.

    I don't see the need to enable all guest features the UniFi controller offers and the only two that are of interest to me is setting up a guest network and restricting access (options 1 and 4). This is a straight-forward process that will only take a few minutes.

    Guest Network

    A new wireless network will need to be created and be marked as a guest network. To do this, we need to set the following:

    • Name/SSID: MyGuestNetwork
    • Enable this wireless network: Yes
    • Security: WPA Personal. Add a password
    • Guest Policy: Yes

    All other Advanced Options can be left as they are.

    UniFi Controller - Guest Network Access Point

    Guest Control

    To make devices unavailable over your newly create guest network, you can simply add IPV4 hostname or subnet within the "Post Authorisation Restrictions" section. I've added the IP to my Synology NAS - 172.16.1.101.

    UniFi Controller - Guest Control

    If all has gone to plan when connecting to the guest WAP you will not be able to access any network connected devices.

  • Published on
    -
    2 min read

    UniFi: Unable To Access Synology On Local Network

    Investing in a UniFi Dream Machine has been one of the wisest things I've done last year when it comes to relatively expensive purchases. It truly has been worth every penny for its reliability, security and rock-solid connection - something that is very much needed when working from home full-time.

    The Dream Machine has been very low maintenance and I just leave it to do its thing apart from carrying out some minor configuration tweaks to aid my network. The only area that I did encounter problems was accessing the Synology Disk Station Manager (DSM) web interface. I could access Synology if I used the local IP address instead of the "myusername.synology.me" domain. Generally, this would be an ok solution, but not the right one for two reasons:

    1. Using a local IP address would restrict connection to my Synology if I was working outside from another location. This was quite the deal-breaker as I do have a bunch of Synology apps installed on my Mac, such as Synology Drive that carries out backups and folder synchronisation.
    2. I kept on getting a security warning in my browser when accessing DSM regarding the validity of my SSL certificate, which is to be expected as I force all connections to be carried out over SSL.

    To my befuddlement, I had no issue accessing the data in my Synology by mapping them as network drives from my computer.

    There was an issue with my local network as I was able to access the Synology DSM web interface externally. From perusing the UniFi community forum, there have been quite a few cases where users have reported the same thing and the common phrase that came popping up in all the posts was: Broken Hairpin NAT. What is a Hairpin NAT?

    A Hairpin NAT allows you to run a server (in this case a NAS) inside your network but connect to it as if you were outside your network. For example via a web address, "myusername.synology.me" that will resolve to the internal IP of the server.

    What I needed to do was to run an internal DNS server and a local entry for "myusername.synology.me" and point that to the internal IP address of the NAS. What was probably happening is that my computer/device was trying to make a connection past the firewall and then back in again to access the NAS. Not the most efficient way to make a connection for obvious reasons and in some cases may not work. A loopback would resolve this.

    A clever user posted a solution to the issue on the UniFi forum that is very easy to follow and worked like a charm - Loopback/DNS Synology DiskStation.

    I have also saved a screenshot of the solution for posterity.

  • Published on
    -
    5 min read

    Time Is The School In Which We Learn

    I've always considered time an enemy as I always had a disdain for how fast the hours and days would just fly by. The speed dial seems to turn a little more further with every year that passes and then one day you wake up and you're the big 3-5!

    Ever since the pandemic hit, time has become an enemy once again but for a different reason entirely... It just goes sooo slow! On top of that how one would normally progress themselves (for business and pleasure) before the pandemic is no longer within our reach. With the combination of living on my own and a somewhat lack of social interactions, you can easily find yourself just letting time pass doing a whole lot of nothing.

    The following quote by Delmore Schwartz, an American poet, resonates with me:

     Time is the school in which we learn,  Time is the fire in which we burn.

    The worst thing I can do is let time pass and have nothing to show for it. There is a need for something tangible to prove my worth over this period to look back on. For me, writing about what I've learnt is something I can use to quantify progress and this very post just adds to that. I am hoping this will be the fuel to focus on cranking out more posts throughout the year.

    I decided to write about the areas in my life that give me the ability to hone my skill set and the process involved.

    The Workaholic

    Most of my learning happens in a work environment as I am constantly allowed to work on upcoming technologies and platforms. This is probably the reason why I’ve become quite the workaholic. I’m lucky to be in a job that is of great interest to me where I can flex my technical muscle. I am constantly learning new things based on challenging client requirements and that in itself plants the seeds on what I need to learn next.

    In the UK, the average working hours per week is 42.5 - above the European average of 41.2. I generally work 45-50 hours a week and that’s not to brag. It’s fun and I genuinely enjoy it. Maybe working from home has also contributed to this. After all, there is nothing else to do in the current climate we find ourselves in.

    So far, this year alone, I've learnt the following within a working environment:

    • Azure Functions
    • Azure DevOps
    • Hubspot
    • Hubspot API Development
    • Ucommerce

    The Daily 30-Minute Cram Session

    Mastering something is just a matter of investing some time no matter how short a learning session is. As minutes become hours and hours become days, it all adds up.

    I have a regiment where my day starts with a quick 30-minute learning session on a subject of interest to me. It’s quite surprising how effective a 30-minute cram session can be. I have progressed through my career and adapted to learning new subjects quicker by doing just this. This has benefitted me in other areas: preparing for meetings.

    There have been numerous times within my job where I have to be in client meetings to talk about platforms that may be a little foreign to me and provide solutions. I now feel relatively confident that I'm prepared for such a meeting within a short period of 30 minutes.

    At the time of writing, my current 30-minute cram sessions are focused on Hubspot development to push the boundaries on what the platform can do and keeping up with Azure’s vast offerings.

    Focus Time

    I have my "30 Minute Cram Session" but when is the best time to do them? I find the most ideal time is the start of a working day where I get to my desk an hour before the working day starts. Normally, this would be impossible pre-Covid times, as this time would be spent getting my things together and making my way to work. Throughout the pandemic, I have continued to get up at my normal time so I can get to my desk by 8 am.

    I find it amazing what this one hour of solitude can give me. I either use to extend a "30 Minute Cram Session" for reading and research or to just get through some tasks before the working day starts. After the pandemic is over and normal life resumes, I hope this can continue.

    Creating A Knowledgebase Through Blogging

    Being the forgetful person I am (just ask my mum!), I find I remember things more when I write about them - one of the main reasons I started this blog. It allows my brain to process big subjects into more digestible chunks. To aid this further, I added Algolia search to my site at the start of the year, as there have been several times where it's taken me too much time to find something I've previously written.

    I have quite a backlog of stuff that I want to write and sometimes I find it difficult to put some technical subjects into words. Believe it or not, I generally find writing a little difficult even after 10+ years of blogging. But I like this challenge.

    My approach to writing blog posts is a little unconventional. I work on a handful at a time. Each post starts in my note-taking application of choice, Evernote,  where I can start things off simple with a subject title, a skeletal structure to then flesh out. I then write in small chunks across various posts.

    Twitter

    I may not post much to Twitter, but I follow people who either work in the same industry like me or those who instil similar interests. The conversations that are had on the platform open my eyes to other areas I should be looking into. As a result, this breaks the monotony of approaching something I've been doing the same for so long and try a different approach. It was tweets that got me into seeing the power of Azure Functions and provided an alternative way of running a piece of code on a schedule effortlessly.

    Ongoing List of Ideas

    Along with my pile of "in progress" blog posts to write, I also have a to-do list of potential things I want to work on. It could be random things of interest based on what I see day-to-day.

    For example, I am currently looking into creating my own Twitter bot (not the spamming kind) that carries out some form of automation. I see quite a few of these bots when checking Twitter and interested to see how I could create my own.

    I don't plan on developing anything fancy, such as the very impressive colorize_bot, where black and white images are made colour by simply mentioning the Colorize Bot Twitter handle. But maybe something a little more reserved, such as some textual response based on a hashtag or phrase.

    Putting such ideas into practice is the prime environment to learning as I'm developing something that is of interest to me personally on a subject that excites me.

  • Published on
    -
    2 min read

    MacBook Pro Charge Limiting for Battery Health

    Since working from home, my laptop is constantly left plugged into the mains as there isn’t much of a reason to ever disconnect, especially when you have a nice office to work in. I’ve been told leaving your laptop on charge has a negative impact on the longevity of your battery.

    I’ve learnt this the hard way. The battery from my previous laptop, a Macbook Pro 2015, died a slow death until it got to a point where it soon became a glorified workstation. This seemed to happen quicker than I would have liked - within 3 years from purchase. Not something I’d expect from the build quality expected from an Apple product.

    I was brave enough to replace the battery myself giving a new lease of life! The post teaser image is proof of my efforts. That picture was taken in when I managed to carefully pry the first cells of the old battery away from the existing adhesive. This was the most hardest part of the whole process!

    My old laptop has now been replaced with the most recent iteration of the Macbook Pro, as I needed a little more power and most importantly 32GB of RAM to run intensive virtual environments. I made the conscious decision to actively take care of the battery and not repeat the mistakes I made in how I used my previous laptop. This is easier said than done especially when my laptop is connected via Thunderbolt to my monitor, both powering my laptop and gives dual-screen capability. It’s impossible to disconnect!

    My only option was to find a “battery charge limiter” application that would set a maximum battery charge. Now, there is a great debate across forums whether going to such lengths does have any positive impact on battery health. Apparently, MacOS’s battery health management should suffice for the majority of scenarios when it comes to general usage. Going by experience, this didn’t help the lifespan of my previous Macbook’s battery. Hence my scepticism.

    One indirect benefit of setting a charge limit is there will be less charge cycles counted, resulting in increased resale value should you decide to sell your laptop. Also, according to the Battery University, setting a charging threshold to 80% might get you around 1500 charge cycles.

    If the likes of Lenovo, Samsung and Sony (all running on Windows) provide support software to limit the charge threshold, there has to be some substance to this approach. Unfortunately, you’re very limited to find a similar official application for macOS. But all is not lost. Two open-source variants carry out the job satisfactorily:

    Both these apps modify the “Battery Charge Level Max” (BCLM) parameter in the SMC, which when set limit the charge level. The only thing to be aware of when using these applications is that sometimes the set charge limit can be wiped after a shutdown or restart. This is a minor annoyance I can live with. Out of the two, my preference was AlDente as I noticed the set charge limit didn’t get wiped as often when compared with Charge Limiter.

    I’ll end this post with one final link from The Battery University on the best conditions to charge any battery - How To Charge and When To Charge.