Blog

Blogging on programming and life in general.

  • Published on
    -
    3 min read

    BlogEngine Disqus Comment Count Fix

    For those of you that have decided to opt out of using BlogEngine’s default commenting system and instead, use Disqus platform will probably encounter a minor issue. The minor issue being the fact that the comment count displayed in within post view doesn’t actually work.

    I needed to make a few modifications to the way Disqus is used within BlogEngine. I have to say that I wasn’t exactly impressed with the way Disqus was setup within the JavaScript code (maybe over-exaggerating). You’ll see what I mean from the Disqus JavaScript code found in “post.aspx” and “page.aspx”:

    <script type="text/javascript">
        var disqus_url = '<%= Post.PermaLink %>';
        var disqus_developer = '<%= BlogEngine.Core.BlogSettings.Instance.DisqusDevMode ? 1 : 0 %>';
        (function() {
            var dsq = document.createElement('script'); dsq.type = 'text/javascript'; dsq.async = true;
            dsq.src = 'http://<%=BlogEngine.Core.BlogSettings.Instance.DisqusWebsiteName %>.disqus.com/embed.js';
            (document.getElementsByTagName('head')[0] || document.getElementsByTagName('body')[0]).appendChild(dsq);
        })();
    </script>
    

    I believe that additional Disqus variable’s should be used, such as:

    • disqus_title - Tells the Disqus service the title of the current page.
    • disqus_identifier -  If this variable is undefined, the page's URL will be used. The URL can be unreliable, such as when renaming an article slug or changing domains, so its recommended using your own unique way of identifying a thread.

    After you have made this change, your JavaScript should look like this:

    <script type="text/javascript">
        var disqus_title = '<%=Post.Title %>';
        var disqus_identifier = '<%= Post.Id.ToString() %>';
        var disqus_url = '<%= Post.AbsoluteLink %>';
        var disqus_developer = '<%= BlogEngine.Core.BlogSettings.Instance.DisqusDevMode ? 1 : 0 %>';
        (function() {
            var dsq = document.createElement('script'); dsq.type = 'text/javascript'; dsq.async = true;
            dsq.src = 'http://<%=BlogEngine.Core.BlogSettings.Instance.DisqusWebsiteName %>.disqus.com/embed.js';
            (document.getElementsByTagName('head')[0] || document.getElementsByTagName('body')[0]).appendChild(dsq);
        })();
    </script>
    

    You may or may not have noticed the “disqus_url” is getting assigned the Post.AbsoluteLink rather than Post.PermaLink. I prefer using the AbsoluteLink since it will output a nice clean friendly URL.

    The next thing we need to do is modify the “PostView.ascx” file found in your themes folder. The line we are looking for is where the Disqus comments link is set.

    <% if (BlogEngine.Core.BlogSettings.Instance.ModerationType == BlogEngine.Core.BlogSettings.Moderation.Disqus)
    { %>
        <a rel="nofollow" href="<%=Post.PermaLink %>#disqus_thread"><%=Resources.labels.comments %></a>
    <%}
        else
    { %>
        <a rel="bookmark" href="<%=Post.PermaLink %>" title="<%=Server.HtmlEncode(Post.Title) %>">Permalink</a> |
        <a rel="nofollow" href="<%=Post.RelativeLink %>#comment"><%=Resources.labels.comments %> (<%=Post.ApprovedComments.Count %>)</a>   
    <%} %>
    

    We need to make two changes to the current comments code. Firstly, we need to add an important missing attribute to the anchor tag. The missing tag is the “data-disqus-identifier”. This is recommended practice by the Disqus Developer guide. Secondly, we need to change the “href” attribute to use an AbsoluteLink instead of a PermaLink. The code should now look like this:

    <% if (BlogEngine.Core.BlogSettings.Instance.ModerationType == BlogEngine.Core.BlogSettings.Moderation.Disqus)
    { %>
        <a rel="nofollow" href="<%=Post.AbsoluteLink %>#disqus_thread" identifier="<%= Post.Id.ToString() %>"><%=Resources.labels.comments %></a>
    <%}
        else
    { %>
        <a rel="nofollow" href="<%=Post.RelativeLink %>#comment"><%=Resources.labels.comments %> (<%=Post.ApprovedComments.Count %>)</a>   
    <%} %>
    

    From personal experience, I believe it is best to carry out the “post.aspx” and “page.aspx” code changes before moving onto the Disqus platform. If you currently have comments that need to be exported to Disqus, I found this exporter tool really useful. Be prepared to carry out a few Disqus imports to get things exactly right.

  • I needed to implement a message board for users to comment on individual articles stored within my Kentico site. To achieve this, I decided to use a message board. Initially, what I found when I implemented the message board web part to my article template was that submitted comments for individual articles were getting displayed on all other articles.

    In my page I am using two Kentico controls: MessageBoardViewer to output the list of comments and MessageBoard for the comments form.

    <%@ Register Src="/CMSWebParts/MessageBoards/MessageBoard.ascx" TagName="MessageBoard" TagPrefix="cms" %>
    <%@ Register Src="/CMSWebParts/MessageBoards/MessageBoardViewer.ascx" TagName="MessageBoardViewer" TagPrefix="cms" %>
    
    <cms:MessageBoardViewer ID="MessageBoardViewer1" runat="server" Enabled="true" HideControlForZeroRows="false" DisplayOnlyApproved="true" DisplayToRoles="Registered;Paid" ShowForDocumentTypes="NewsSite.News" ZeroRowsText="No Messages in viewer" TransformationName="Community.Transformations.MessageBoard" AlternatingItemTransformationName="Community.Transformations.MessageBoard"></cms:MessageBoardViewer>
    <cms:MessageBoard ID="MessageBoard1" BoardModerated="true" runat="server" BoardUseCaptcha="false" BoardAccess="AllUsers" DisplayToRoles="Paid" BoardOpened="true" BoardRequireEmails="false"  BoardEnableSubscriptions="true" ></cms:MessageBoard>
    

    I came across a fix on the (very informative) Kentico forums whereby a user carried out a where condition on the MessageBoardViewer control to retrieve article comments through the “BoardDisplayName” field:

    MessageBoardViewer1.WhereCondition = 
        String.Concat("BoardDisplayName = '", 
                        CMSContext.CurrentDocument.GetValue("Title"), " (", 
                        CMSContext.CurrentDocument.DocumentNamePath, 
                      ")'"); 
    

    Some of you may not know, the Board Display Name field is also used in the Message board section within CMS Desk.

    Kentico Message Board Admin

    Retrieving comments based on the Board Display Name is in my opinion not the best way. As you can see from the title of my document (above) contains single quotes. This would cause an SQL syntax error (which I did experience).

    To get around this, it is best to query the MessageBoardViewer control using the “BoardDocumentID” field. So the code will be as follows:

    MessageBoardViewer1.WhereCondition = 
        String.Concat("BoardDocumentID = ", 
                        CMSContext.CurrentDocument.DocumentID); 
    

    If anyone knows of a better way of achieving the same thing. Please leave a comment. I am relatively new to Kentico and probably missed a trick!

  • Whilst carrying out some tests on my blog after upgrading my blog platform from BlogEngine 1.6 to 2.0, I noticed an error occurring when a comment was in process of getting submitted. The error that cropped up was: “There was an error in callback”. The strange thing about this error was that it only occurred for Internet Explorer users. In other mainstream browsers (I do not class Internet Explorer as a mainstream), my comments were successfully submitted.

    There Was Error In Callback

    As it turns out, the issue was due to one of my BlogEngine extensions. When I disabled the “Recaptcha” extension all worked as expected. I still need to investigate what is causing the “Recaptcha” extension to error since this is one of the most important extensions to void all spammers out there.

    Recaptcha Extension

    So if you are also experiencing a similar error, disabling the Recaptcha extension may help.

    I will post further updates if I manage to get the commenting system working using Recaptcha. But since BlogEngine is now supporting the Disqus commenting platform, I may decide to make the move.

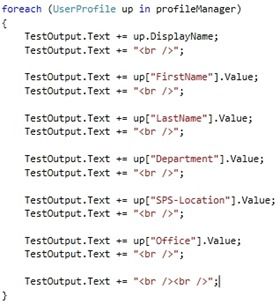
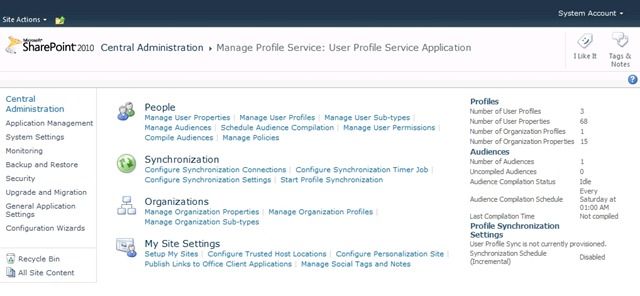
  • I needed to create a web part that simply output all information from an Announcements list. Sounds simple doesn’t it? But I came across a compiler error when using the “Created By” and “Modified By” columns. The error was telling me that the columns I am trying to read in my code do not exist.

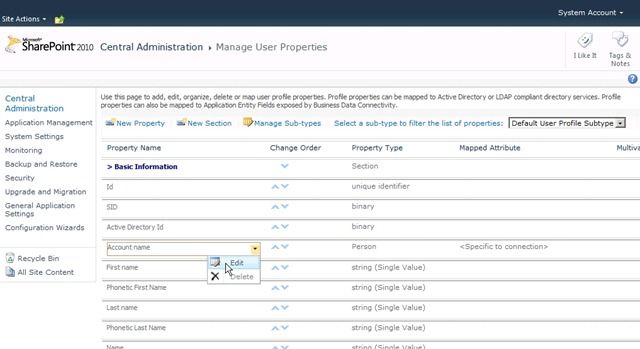
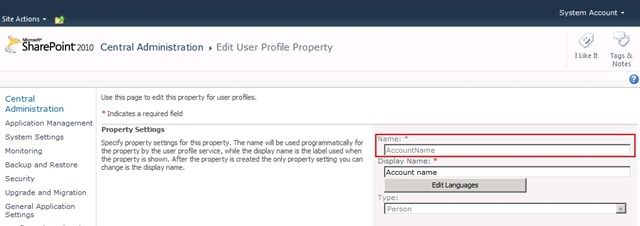
    After some Googling, I found out that SharePoint has something called “Internal Field Names”, whereby the display name of a column isn’t the actual column name. The full list of internal field names can be found at Michael Yeager's MSDN Blog.

    If ever in doubt, you can find out the internal field names within SharePoint, by carrying out the following:

    1. Go to your list and select “List Settings” from the ribbon.

    2. Navigate to the where the list of columns are displayed and right click on the column in question. Select “Properties”.

    SP2010 Hidden Field Right Click

    1. When the link property window opens, scroll to the end of the “Address: (URL)” section. You will find a query string parameter called “Field”. This query string parameter contains the real field name.

    SP2010 Hidden Field Properties

    Confusing isn’t it? Well I guess it wouldn’t be SharePoint if the most simplest task failed to confuse a developer.

  • One of the best development features in making customisations within a SharePoint environment is the SPMetal tool. The SPMetal tool generates entity classes in order to use LINQ syntax to retrieve items from lists. The SPMetal.exe resides in the 14/bin folder. I will show you a quick demonstration on how I have generated a DataContext class using the SPMetal executable.

    You will need to create two files:

    1. XML file – containing the list or library name we are interested in generating our class from. In the code snippet (below), the list I am interested in is called Quicklinks.
    <?xml version="1.0" encoding="utf-8"?>
    <Web xmlns="http://schemas.microsoft.com/SharePoint/2009/spmetal">
      <List Name="Quicklinks" Member="Quicklinks" />
      <ExcludeOtherLists />
    </Web>
    

    Save the XML file into the 14/bin director and name it “SPMetalConfig.xml”.

    1. Batch File – will contain the SharePoint command prompt needed to fire the SPMetal executable. Creating a batch file is not required. You can run the command as normal through Windows Command Line. I just find it a lot easier to manage and make changes using a batch file.
    SET SPMETALDIR="C:\Program Files\Common Files\Microsoft Shared\Web Server Extensions\14\BIN\" 
    
    cd %SPMETALDIR% 
    
    spmetal.exe /web:http://myintranet /code:QuicklinksOMEnitites.cs /parameters:SPMetalConfig.xml
    

    Once this has run, a class called “QuicklinksOMEnitites.cs” will be generated in the 14/bin folder.

    SPMetal.exe

    One thing I did find when using SPMetal for retrieving list data to be output to a custom webpart was that it is only able to retrieve data from a site collection the list resides. But this is probably to be expected. So if the webpart was used in a separate site collection, no data will be shown. In order to get around this, SPMetal will not suffice. You will need to go through the code route and do the following:

    SPSecurity.RunWithElevatedPrivileges(delegate()
    {
        using (SPWeb intranetSite = new SPSite("http://myintranet/sites/depts/").OpenWeb())
        {
            SPList quickLinks = intranetSite.Lists.TryGetList("Quicklinks");
            
            if (quickLinks != null)
            {
                //Do something with list data.
            }                           
        }
    }); 
    
  • From one of the projects I have been working on, I came across a snippet of code that used the XmlDocument.Load method. What alarmed me about this piece of code was the fact that there was no error handling. If for some reason the XML file could not be found or a node was missing, the whole page would have crashed. Not good.

    I must admit, I am not exactly the best person to speak about implementing wide-scale error handling in every facet of code. But I do ensure the core foundations of an application or website do incorporate sufficient error handling.

    So back to the matter in hand. This is the original code using the XmlDocument.Load functionality:

    XmlDocument doc = new XmlDocument();
    
    doc.Load(Server.MapPath("/xml/storeGB.xml"));
    
    XmlNode countryNode = doc.SelectSingleNode("//countries");
    foreach (XmlNode node in countryNode.ChildNodes)
    {
        //Do something with the elements
        Response.Write(node.Name + node.InnerText);
    }
    

    I changed the code to the following:

    XmlDocument doc = new XmlDocument();
    
    //Check if language XML file exists
    if (File.Exists(Server.MapPath("/xml/storeGB.xml")))
    {
        try
        {
            doc.Load(Server.MapPath("/xml/storeGB.xml"));
    
            XmlNode countryNode = doc.SelectSingleNode("//countries");
    
            if (countryNode != null)
            {
                foreach (XmlNode node in countryNode.ChildNodes)
                {
                    //Do something with the elements
                    Response.Write(node.Name + node.InnerText);
                }
            }
            else
            {
                //Output error message if there is no node
            }
        }
        catch (XmlException ex)
        {
            Debug.WriteLine(String.Format("XmlException for countries: {0}", ex.Message));
        }
    }
    

    I am sure you will agree that this is the better approach to using XmlDocument.Load.

  • Published on
    -
    1 min read

    String.Format In JavaScript

    Whenever I work with strings whilst programming in .NET, somewhere along the lines I always find myself using the awesome “string.format”. I think all of you will admit its the most useful and easiest way to build up your strings.

    The only downside to using the “string.format” method is that it lures you into a false sense of security and you find yourself lost without it when it comes to working with strings in other languages. This happened to me when I had to build up a long string in JavaScript. It was long and tedious…or maybe I am just lazy.

    Luckily, there have been a few developers who extended the string object in JavaScript to include “string.format”. Amazing! Its goes along the lines of adding this to your own JavaScript code:

    String.format = String.prototype.format = function() {
        var i=0;
        var string = (typeof(this) == “function” && !(i++)) ? arguments[0] : this;
    
        for (; i < arguments.length; i++)
            string = string.replace(/\{\d+?\}/, arguments[i]);
    
        return string;
    }
    

    Here are some other useful links I have found on how to implement “string.format” into your JavaScript code:

  • The “Remove Format” button (Remove Formatting Button) within FCKEditor, only removes valid inline elements such as: strong, span, strike, font, em, etc.
    If you want to be able to make the Remove Formatting function more flexible so that it removes block elements, you can do so by modifying the “fckconfig.js” file found within the FCKeditor folder.

    Search for the “FCKConfig.RemoveFormatTags” line, which will look something like this:

    FCKConfig.RemoveFormatTags = 'b,big,code,del,dfn,em,font,i,ins,kbd,q,samp,small,span,strike,strong,sub,sup,tt,u,var';
    

    All you need to do now is add any additional elements you wish to remove from your content. In my case, I wanted the Remove Formatting button to remove all header tags. So I carried out the following:

    FCKConfig.RemoveFormatTags = 'b,big,code,del,dfn,em,font,i,ins,kbd,q,samp,small,span,strike,strong,sub,sup,tt,u,var,h1,h2,h3';
    
  • I have been developing custom web parts and SharePoint customisations for a couple years now. During the early stages of SharePoint development I found a great deal of confusion when trying to retrieve information from different areas of an intranet through using the SPSite and SPWeb methods.

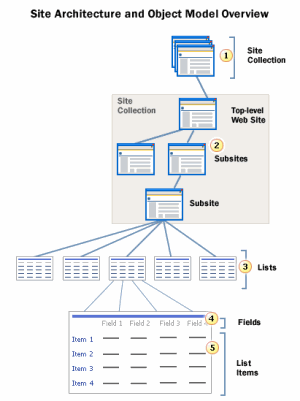
    I think any other developer who is starting out SharePoint development may encounter the same issue. What I found useful was the “Site Architecture and Object Model Overview” diagram from the MSDN site.

    SharePoint Site Architecture

    It nicely breaks down the architecture of a SharePoint site. I highly recommend that you take look at the following links containing more diagrams:

    Whilst I am talking about SPSite’s and SPWebs’s in this post, I’ll give you quick overview on how they work using the (above) diagram. Basically, the top level site collection (SPSite) contains your root web (SPWeb) and subsites (SPWebs under SPWebs). So, a subsite will be any site (SPWeb) under the top level web site in a site collection (SPSite).

  • In light of what has happened recently with some 150,000 Google Account holders loosing their information due to a mishap at Google HQ over the weekend really reinforces the fact that our data is not safe…even in the “cloud”.

    At the end of the day our information is stored on hardware that can fail. I think that this whole “cloud computing” malarkey has got all lured into a false sense of security where we think we don’t need to take measures to ensure our data backed up on a regular basis. I have to admit, I too have become a bit tardy when it comes to backing up my online data. If a large company like Google can get it wrong, what hope is there for other companies offering the same thing?

    I practically live on the “cloud” in terms of what Google has to offer. I use their email, calendar, document and notebook applications. Even their mobile phone OS: Android! Luckily, there are steps we can take to ensure our data is backed up on your own terms:

    Google Calendar Google Calendar

    Google Calendar is the one application I use the most. If I lost all my data, I would quite annoyed to say the least (and be very disorganised).

    You can backup all your calendar entries by opening your calendar settings, click on Calendars and select “Export Calendars”. A zip file will be created containing your calendars in a .ical format.
     
    GmailLogo Gmail

    This a simple one. Use an desktop email client such as Thunderbird (or any other client you prefer) to download all your emails directly to you computer through POP access.
     
    GoogleDocsLogo Docs

    If you only store a handful of documents in your Google Account, you could just download them one-by-one. Understandably, if you have a long list of documents a more automated approach is required.

    Lifehacker.com shows a really great script you can use to that allows you to download documents in whatever format you require. Take a look here.
     

    Hooray! Our data is saved!