Blog

Posts written in April 2022.

  • NOTE: This post began as a demonstration of how quickly I can create and publish blog entries on the go using Working Copy Git Client on my iPad while in India. I got 90% of the way through this post, but I didn't have time to finish it, utterly defeating the point of the post. Anyway, without further ado…

    I thought this would be the most opportune moment to try out the Working Copy Git Client app on my iPad to see if I’m able to update my blog on the go. I’m also using this time as a small test to myself to see whether I’m able to focus and write on the fly anywhere. The last time I did anything similar was on my return from Bali, where I wrote my experiences offline using Evernote on my phone to then add to my website later.

    This time, I wanted to try something different as I have a few hours to kill. So I'm writing this post sitting in the seating area of Heathrow Airport waiting to board my flight. If everything goes to plan, this very post should auto-publish on commit to my website hosted on Netlify.

    I’m off to India to experience one of the most major milestones in my life - getting married Indian style! I’d like to class this as part deux of “getting married” after performing our English ceremony during the back end of Covid restrictions last year. So this seems a great time to put the Working Copy app and my iPad writing flow to the test, where my beloved Macbook Pro is nowhere in sight to aid the publishing of this post.

    As I write this post, it looks like my core writing eco-system will remain unchanged:

    1. Write up the post in Evernote.
    2. Spelling, phrasing and grammar check using Quillbot (previously Grammarly).
    3. Add post in markdown format to my Gatsby website project.
    4. Commit website updates.

    The true test will come when I write a post that contains more than a handful of images. It's something that doesn't happen very often - only when it comes to holidays. But I can see cropping, compressing and positioning images for a blog post on an iPad a little fiddly, especially on an 10 inch iPad Air.

    So how does Working Copy fair in my very first piece of "on-the-go" writing?

    Initial Setup

    Getting up and running couldn't have been easier. After installation, I logged into my Bitbucket account and cloned my website repo, I was ready to go. For a site housing approximately 294 posts, it has a relatively small footprint (images are included): 54MB. I am so glad I decided to make the switch to GatsbyJS static-site generation and move away from the traditional server-side application connected to a database.

    Everything you'd expect from a git client is present, such as:

    • Clone
    • Pull
    • Push
    • Fetch
    • Merge
    • Branch Creation

    Editor

    The editor is as I would expect it to be. Simple, clear and concise with basic syntax highlight, which is something that I would expect from an app built for a tablet device. If you think this can be a replacement for your traditional coding IDE, you'd be mistaken. Anyway, why would you want to do full-on coding on a tablet device?

    Working Copy Editor

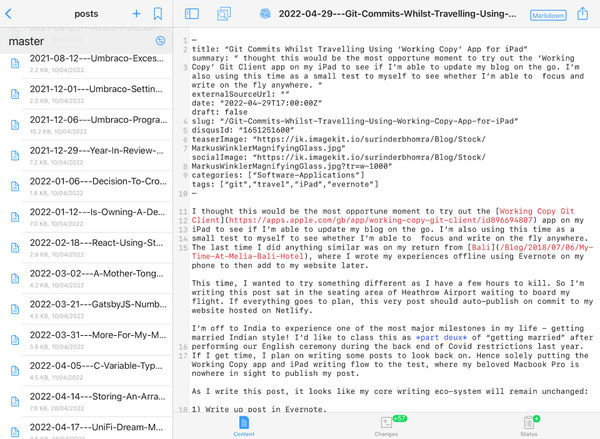
    I like how easily navigable the interface is. There is little to no learning curve when using it for the first time.

    Native Integration with iOS Files

    Now, this is where I feel I'm familiar territory. Being able to drag and drop files, such as images and text files from iOS’s Files layer into my Git repo - just like if I was working on a laptop. I’ve also seen other users write their posts outside using iA Writer or Pretext editor apps before dropping the text file into their repo.

    Working with Images

    I've never found working with image manipulation on the iPad that easy, hence why I like to use my Macbook Pro for the final finessing of my post before publishing. I have the tools I need to resize and compress images. Most photo app's on the iPad solely pull in images housed in Apple Photos. Even though I have an iPad and Macbook Pro, I don't like being locked into a single eco-system, especially when the majority of apps work well across different platforms.

    Image Size is a free app that allowed me to crop and resize photos stored in iOS Files by simply stating the dimensions I require. Added bonus: The app is free!

    Once the image is resized, I can carry out compression using TinyPNG and lastly simply perform a drag and drop into the Working Copy app.

    Conclusion

    I always wanted to have the ability to update my website on the go on a tablet device and Working Copy makes this very easy. When you add the iOS File System and Image Size app, you have everything for your writing needs.

    I never thought that I'd be comfortable publishing posts directly to my website from an iPad. Overall, I found the writing experience to be very efficient as I encountered fewer distractions when compared to working on my Macbook Pro.

    If there was anything I could change, it would be the size of my iPad. I did find Working Copy took a lot of screen real-estate, especially when having multiple windows open. The 12-inch iPad Pro looks very tempting.

    Did I manage to write and submit this post directly from my iPad? Yes.
    Would I do it again? Yes!

  • I'm writing this post simply for the purpose of reminding myself of how I built my first shell script... I'm not sure if admitting this is a positive or negative thing. Writing shell scripts has never truly been a part of my day-to-day work, but understood the core concepts and what they are able to do.

    I decided to write this shell script to perform a rather easy task: cycle through all CSS and JS files in a directory and change a string within each file with the value that was entered into the shell script. The main use of this script, for my use, is to update path references in these files.

    # Script Name: CSS/JS Path Replacer #
    # Description: Iterates through all directories to replace strings found in CSS and JS files. #
    #               Place this bash script in the directory where the files reside. #
    #               For example: /resources. #
    
    # Take the search string.
    read -p "Enter the search string: " search
    
    # Take the replace string.
    read -p "Enter the replace string: " replace
    
    FILES="./**/*.min.css ./**/*.css ./**/*.min.js ./**/*.js"
    
    for f in $FILES
    do
    	echo "Processing $f file..."
      
    	sed -i "s/${search//\//\\/}/${replace//\//\\/}/g" $f
    done
    
    $SHELL
    

    To carry out a replace within each file, I'm using the sed command:

    sed -i "s/old-value/new-value/g" filename.txt
    

    This command tells sed to find all occurrences of "old-value" and replace with "new-value" in a file called "filename.txt". As the main purpose of the script is to update path references within CSS and JS files, I had to escape forward slashes in the "search" and "replace" variables when parsed to the sed command.

    Bash script in use:

    Enter the search string: /surinder-v1/resources
    Enter the replace string: /surinder-v2/resources
    Processing ./css/site.min.css file...
    Processing ./css/site.css file...
    Processing ./css/site.min.css file...
    Processing ./css/styleguide.css file...
    Processing ./js/global.min.js file...
    Processing ./js/global.min.js file...
    

    Once the script has processed all the files, any reference to "/surinder-v1/resources" will be replaced with "/surinder-v2/resources".

    Further useful information about using the "sed" command can be found in the following post: How to use sed to find and replace text in files in Linux / Unix shell.

  • One of the first steps in integrating Apple Pay is to check the domain against the Developer Account. For each merchant ID you've registered, you'll need to upload a domain-verification file. This involves placing the verification the following path for your domain:

    https://[DOMAIN_NAME]/.well-known/apple-developer-merchantid-domain-association
    

    As you can see, the "apple-developer-merchantid-domain-association" file does not contain an extension, which will cause issues in IIS permitting access to serve this file. From what I've read online, adding an "application/octet-stream" MIME type to your site should resolve the issue:

    IIS Mime Type - Octet Stream

    In my case, this didn't work. Plus I didn't like the idea of adding a MIME type purely for the purpose of accepting extension-less paths. Instead, I decided to go down the URL Rewriting route, where I would add the "apple-developer-merchantid-domain-association" file with a ".txt" extension to the "/.well-known" directory and then rewrite this path within the applications web.config file.

    <rewrite>
    	<rules>
    		<rule name="Apply Pay" stopProcessing="true">
    		  <match url=".well-known/apple-developer-merchantid-domain-association" />
    		  <action type="Rewrite" url=".well-known/apple-developer-merchantid-domain-association.txt" appendQueryString="false" />
    		</rule>
    	</rules>
    </rewrite>
    

    Through this rewrite rule, the request path is is changed internally and the URL of the request displayed in the address bar (without the extension) stays the same. Now Apple can verify the site.

  • Published on
    -
    2 min read

    UniFi Dream Machine Slow Internet Speed

    I've owned my UniFi Dream Machine router router for a little over two years, and I'm still getting accustomed to the wide array of configuration options available in the device admin settings. My usual rule of thumb is to only fiddle with the settings if absolutely necessary.

    Today was the day when I needed to change one setting on my router so that my download and upload speeds were not limited. Embarrassingly, I've been criticising Virgin Media, my internet service provider (ISP), for not keeping their half of the bargain in supplying me with appropriate broadband speed as promised, only to discover that it was all along my Dream Machine. Very unexpected.

    In the UniFi Network settings, look out for an option called "Smart Queues" where the download and upload speeds limits can be increased or disabled in its entirety.

    UniFi Smart Queue Setting

    What is "Smart Queues" and why would we need it? "Smart Queues" helps decongest networks with lots of clients and constant load. When enabled it will reduce the maximum throughput in order to minimise latency over the network when the connection is at full capacity. Low latency is important for voice/video calls and fast-paced online multiplayer gaming. The following StackOverflow post adds further clarity on the subject:

    Most routers and modems have a design flaw called "bufferbloat"; when your Internet connection gets fully loaded (congested), they mismanage their queues of packets waiting to be sent, and let the queue grow out of control, which just adds latency with no benefit. SQM is the fix for bufferbloat.

    SQM is only tangentially related to QoS. Traditional QoS schemes prioritize some kinds of traffic over others, so when there is congestion, the lower-priority traffic gets slammed with congestion-related latency, and the high-priority traffic hopefully skates by without problems. In contrast, SQM tries to keep the latency low on all traffic even in the face of congestion, without prioritizing one kind of traffic over another.

    I made a decision to disable "Smart Queues" as there isn't enough network traffic used in my household to warrant any form of QoS consideration. This setting can be found by logging into the router Network section > Settings > Internet > WAN Networks > Advanced.

    Once disabled, the difference in internet speed is like night and day.

    Before:

    Internet Speed - Before

    After:

    Internet Speed - After

  • Published on
    -
    5 min read

    Storing An Array of Images In localStorage

    I've worked on numerous projects that required the user to upload a single or a collection of photos that they could then manipulate in some manner, whether it was adding filtering effects or morphing their face for TV show promotion.

    In any of these projects, the user's uploaded photo must be kept for a specific amount of time - long enough for the user to manipulate their image. The question that had always arisen in terms of GDPR, as well as development perspective, was: How long should the users' uploaded photos be stored?

    Previously, these photos were stored in the cloud in a temporary blob storage container, with an hourly task that removed images older than 6 hours. This also ensured that the storage container remained small in size, lowering usage costs.

    Then one day, it hit me... What if a user's uploaded photos could be stored locally through their own browser before any form of manipulation? Enter local storage...

    What Is Local Storage?

    Local storage allows data to be stored in the browser as key/value pairs. This data does not have a set expiration date and is not cleared when the browser is closed. Only string values can be stored in local storage - this will not be a problem, and we'll see in this post how we'll store a collection of images along with some data for each.

    Example: Storing Collection of Photos

    The premise of this example is to allow the user to upload a collection of photos. On successful upload, their photo will be rendered and will have the ability to remove a photo from the collection. Adding and removing a photo will also cause the browser's localStorage` to be updated.

    Screenshot: Storing Images in Local Storage

    A live demo of this page can be found on my JSFiddle account: https://jsfiddle.net/sbhomra/bts3xo5n/.

    Code

    HTML

    <div>
      <h1>
        Example: Storing Images in Local Storage
      </h1>
      <input id="image-upload" type="file" />
      <ul id="image-collection">    
      </ul>
    </div>
    

    JavaScript

    const fileUploadLimit = 1048576; // 1MB in bytes. Formula: 1MB = 1 * 1024 * 1024.
    const localStorageKey = "images";
    let imageData = [];
    
    // Render image in HTML by adding to the unordered list.
    function renderImage(imageObj, $imageCollection) {
      if (imageObj.file_base64.length) {
        $imageCollection.append("<li><img src=\"data:image/png;base64," + imageObj.file_base64 + "\"  width=\"200\" /><br />" + imageObj.name + "<br /><a href=\"#\" data-timestamp=\"" + imageObj.timestamp + "\" class=\"btn-delete\">Remove</a></li>")
      }
    }
    
    // Add image to local storage.
    function addImage(imageObj) {
      imageData.push(imageObj);
      localStorage.setItem(localStorageKey, JSON.stringify(imageData));
    }
    
    // Remove image from local storage by timestamp.
    function removeImage(timestamp) {
      // Remove item by the timestamp.
      imageData = imageData.filter(img => img.timestamp !== timestamp);
    
      // Update local storage.
      localStorage.setItem(localStorageKey, JSON.stringify(imageData));
    }
    
    // Read image data stored in local storage.
    function getImages($imageCollection) {
      const localStorageData = localStorage.getItem(localStorageKey);
    
      if (localStorageData !== null) {
        imageData = JSON.parse(localStorage.getItem(localStorageKey))
    
        for (let i = 0; i < imageData.length; i++) {
          renderImage(imageData[i], $imageCollection);
        }
      }
    }
    
    // Delete button action to fire off deletion.
    function deleteImageAction() {
      $(".btn-delete").on("click", function(e) {
        e.preventDefault();
    
        removeImage($(this).data("timestamp"));
    
        // Remove the HTML markup for this image.
        $(this).parent().remove();
      })
    }
    
    // Upload action to fire off file upload automatically.
    function uploadChangeAction($upload, $imageCollection) {
      $upload.on("change", function(e) {
        e.preventDefault();
    
        // Ensure validation message is removed (if one is present).
        $upload.next("p").remove();
    
        const file = e.target.files[0];
    
        if (file.size <= fileUploadLimit) {
          const reader = new FileReader();
    
          reader.onloadend = () => {
            const base64String = reader.result
              .replace('data:', '')
              .replace(/^.+,/, '');
    
            // Create an object containing image information.
            let imageObj = {
              name: "image-" + ($imageCollection.find("li").length + 1),
              timestamp: Date.now(),
              file_base64: base64String.toString()
            };
    
            // Add To Local storage
            renderImage(imageObj, $imageCollection)
            addImage(imageObj);
    
            deleteImageAction();
    
            // Clear upload element.
            $upload.val("");
          };
    
          reader.readAsDataURL(file);
        } else {
          $upload.after("<p>File too large</p>");
        }
      });
    }
    
    // Initialise.
    $(document).ready(function() {
      getImages($("#image-collection"));
    
      // Set action events.
      uploadChangeAction($("#image-upload"), $("#image-collection"));
      deleteImageAction();
    });
    

    The key functions to look at are:

    • addImage()
    • removeImage()
    • getImages()

    Each of these functions uses JSON methods to store uploaded photos as arrays of objects. Each photo contains: name, timestamp and a base64 string. One common piece of functionality used across these functions is the use of JSON methods to help us store our collection of photos in local storage:

    • JSON.stringify() - to convert an array to a string.
    • JSON.parse() - to convert a JSON string into an object array for manipulation.

    When saving or retrieving your saved value from local storage, a unique identifier through a "key" needs to be set. In my example, I've set the following global variable that is referenced whenever I need to use the "localStorage" methods.

    const localStorageKey = "images";
    

    When saving to localStorage, we will have to stringify our array of objects:

    localStorage.setItem(localStorageKey, JSON.stringify(imageData));
    

    Retrieving our array requires us to convert the value from a string back into an object:

    imageData = JSON.parse(localStorage.getItem(localStorageKey))
    

    After we've uploaded some images, we can see what's stored by going into your browsers (for Firefox) Web Developer Tools, navigating to the "Storage" tab and selecting your site. If using Chrome, go to the "Applications" tab and click on "Local Storage".

    Browser Developer Tools Displaying localStorage Values

    Storage Limits

    The maximum length of values that can be stored varies depending on the browser. The data size currently ranges between 2MB and 10MB.

    When I decided to use local storage to store user photos, I was concerned about exceeding storage limits, so I set an upload limit of 1MB per photo. When I get the chance to use my code in a real-world scenario, I intend to use Hermite Resize to implement some image compression and resizing techniques.

  • Published on
    -
    3 min read

    C# Variable Type: To 'var', Or Not To 'var'

    This post has been in the works for some time in order to express my annoyance whenever I see every variable in a C# project declared with "var". This is simply laziness... I guess typing three letters is simpler than typing the actual variable type. Even so, I believe that this, among other things, contributes to readability issues.

    I am not completely opposed to its use, as I use it in places where I deem it acceptable and has no effect on readability. My biggest gripe is when an entire project is littered solely with this form of variable declaration. Whenever I come across a project like this, I have to run a Visual Studio tool that automatically changes variables to use an explicit type instead.

    Some may argue that readability is unaffected because you can obtain type information simply by hovering over any variable in Visual Studio. A perfectly valid point. However, things become more obfuscated when quickly glancing at some code via Notepad, Github.com, or during code reviews.

    From what I've seen on forums, there are various points of view, some of which I agree with and wanted to share my thoughts.

    Opinion 1: Saves Time Through Less Keystrokes

    List<ContactInfoProvider> contacts = new List<ContactInfoProvider>();
    // vs.
    var contacts = new List<ContactInfoProvider>();
    

    This assumes a developer is using an IDE with no intellisense capability. This shouldn't be a problem since intellisense will quickly resolve the class and types in use. According to some developers I work with, declaring long type names is messy and adds unnecessary extra noise.

    I don't mind this approach since the type in use is evident.

    Opinion 2: Readability Is Not An Issue

    To expand upon the point I made in my intro about code being obfuscated, lets take the following snippet of code:

    ...
    var contactInfo = ContactInfoProvider.GetContactInfo(token);
    ...
    

    I'm unable to see what type is being returned immediately unless I delve into the ContactInfoProvider class and view the method. "var" should never be used where the type is not known because it reduces recognition readability in code.

    Opinion 3: Use "var" On Basic Variable Types

    var maxRecords = 100;
    var price = 1.1;
    var successMessage = "Surinder thinks this is wrong!";
    var isSuccess = false;
    
    // vs.
    
    int maxRecords = 100;
    decimal price = 1.1;
    string successMessage = "Surinder thinks this is correct!";
    bool isSuccess = true;
    

    I did state earlier the use of "var" is acceptable where the type used is clearly visible. Basic variable types is an exception to the rule as it's completely unnecessary.

    Opinion 4: Encourages Descriptive Variable Names

    var productItem = new ProductInfo()
    // vs.
    ProductInfo pi = new ProductInfo()
    

    This is where I disagree. Descriptive variable names should always be used, regardless of whether the variable is declared explicitly or implicitly. In my time as a developer, I've seen some dreadful variable names in both instances.

    Conclusion

    There is no right or wrong way to use "var," and it is entirely up to personal preference. I only use "var" when I'm writing quick test code, playing with LINQ, or when I'm not sure what the outcome of a method is when dealing with external API libraries.

    Even though I relish learning new code notations and refactoring, I will continue to use "var" very sparingly (if at all!) in my own code. But the overall use of it just doesn't sit right with me. Strict typing ensures the most clearest approach, so a developer knows exactly what is going to happen once it is typed.

    We should always aim to make our code as clear as possible. It's difficult enough to understand explicitly set variables that aren't self-descriptive without having to add "var" to the mix.

    Forrest Gump - Thats All I Have To Say About That