
Switch Branches In TortoiseGit
- Published on
- -1 min read
My day to day version control system is Bitbucket. I never got on with their own Git GUI offering - Sourcetree. I always found using TortoiseGit much more intuitive to use and a flexible way to interact with my git repository. If anyone can change my opinion on this, I am all ears!
I work with large projects that are around a couple hundred megabytes in size and if I were to clone the same project over different branches, it can use up quite a bit of hard disk space. I like to quickly switch to my master branch after carrying out a merge for testing before carrying out a release.
Luckily TortoiseGit makes switching branches a cinch in just a few clicks:
- Right-click in your repository
- Go to TortoiseGit context menu
- Click Switch/Checkout
- Select the branch you wish to switch to and select "Overwrite working tree changes (force)"
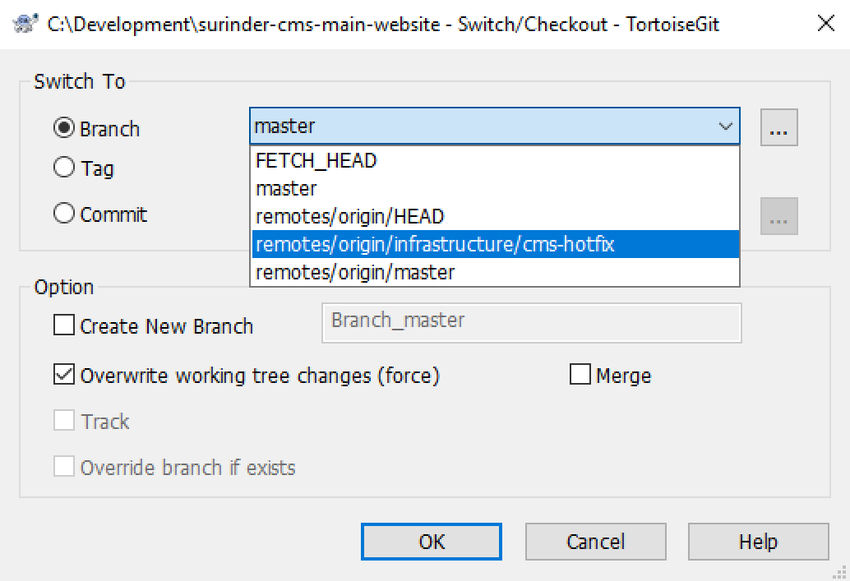
Selecting the "Overwrite working tree changes (force)" tick box is important to ensure all files in your working directory is overwritten with the files directly from your branch. We do not want remnants of files left from the branch we had previously switched from kicking around.
Before you go...
If you've found this post helpful, you can buy me a coffee. It's certainly not necessary but much appreciated!

Leave A Comment
If you have any questions or suggestions, feel free to leave a comment. Your comment will not only help others, but also myself.