Blog

Categorised by 'BlogEngine'.

  • Kentico LogoFor many years, I've been a happy BlogEngine user. However, recently my website was starting to expand in a way that wasn't flexible enough for the BlogEngine platform. Don't get me wrong, BlogEngine is a great blogging platform and it is without a doubt one of the best out on the market. But the capabilities and features Kentico provides made moving over to another platform an easy decision.

    The future of my site needed something that would give me free reign and control on making full customisations myself in a solid framework, and Kentico seemed to fit this requirement.

    Having worked with the Kentico platform for quite a few years now, I was impressed by how easy or complex I could make a site. Most importantly, the page perfomance of my site has got quite a boost. For a site that doesn't look like is doing much at face value, it is behind the scenes.

    What was the migration process like?

    Migrating all my BlogEngine content into Kentico did take some time, but the Kentico Import tool really does take the hassle out of getting key blog post information into the CMS. Just don't be expect tags and categories to be imported in the process. Migrating these facets is a manual job.

    In addition, I decided to overhaul the friendly URL's used for my blog posts in keeping with the URL structure provided by BlogEngine. Even to this day, I'm not sold on the way Kentico generates it's friendly URL's for blog posts. For example:

    /Blog/February-2013/My-Blog-Post.aspx
    

    When it should be the following format:

    /Blog/2013/02/03/My-Blog-Post.aspx
    

    Luckily, it was pretty easy to write a Custom Eventhandler to add additional custom URL paths whenever I update or insert a new post (will add a post in the near future on how to do this).

    I still have some additional features to add to this site (and dare I say fixes!) so watch this space...

  • Published on
    -
    3 min read

    BlogEngine Disqus Comment Count Fix

    For those of you that have decided to opt out of using BlogEngine’s default commenting system and instead, use Disqus platform will probably encounter a minor issue. The minor issue being the fact that the comment count displayed in within post view doesn’t actually work.

    I needed to make a few modifications to the way Disqus is used within BlogEngine. I have to say that I wasn’t exactly impressed with the way Disqus was setup within the JavaScript code (maybe over-exaggerating). You’ll see what I mean from the Disqus JavaScript code found in “post.aspx” and “page.aspx”:

    <script type="text/javascript">
        var disqus_url = '<%= Post.PermaLink %>';
        var disqus_developer = '<%= BlogEngine.Core.BlogSettings.Instance.DisqusDevMode ? 1 : 0 %>';
        (function() {
            var dsq = document.createElement('script'); dsq.type = 'text/javascript'; dsq.async = true;
            dsq.src = 'http://<%=BlogEngine.Core.BlogSettings.Instance.DisqusWebsiteName %>.disqus.com/embed.js';
            (document.getElementsByTagName('head')[0] || document.getElementsByTagName('body')[0]).appendChild(dsq);
        })();
    </script>
    

    I believe that additional Disqus variable’s should be used, such as:

    • disqus_title - Tells the Disqus service the title of the current page.
    • disqus_identifier -  If this variable is undefined, the page's URL will be used. The URL can be unreliable, such as when renaming an article slug or changing domains, so its recommended using your own unique way of identifying a thread.

    After you have made this change, your JavaScript should look like this:

    <script type="text/javascript">
        var disqus_title = '<%=Post.Title %>';
        var disqus_identifier = '<%= Post.Id.ToString() %>';
        var disqus_url = '<%= Post.AbsoluteLink %>';
        var disqus_developer = '<%= BlogEngine.Core.BlogSettings.Instance.DisqusDevMode ? 1 : 0 %>';
        (function() {
            var dsq = document.createElement('script'); dsq.type = 'text/javascript'; dsq.async = true;
            dsq.src = 'http://<%=BlogEngine.Core.BlogSettings.Instance.DisqusWebsiteName %>.disqus.com/embed.js';
            (document.getElementsByTagName('head')[0] || document.getElementsByTagName('body')[0]).appendChild(dsq);
        })();
    </script>
    

    You may or may not have noticed the “disqus_url” is getting assigned the Post.AbsoluteLink rather than Post.PermaLink. I prefer using the AbsoluteLink since it will output a nice clean friendly URL.

    The next thing we need to do is modify the “PostView.ascx” file found in your themes folder. The line we are looking for is where the Disqus comments link is set.

    <% if (BlogEngine.Core.BlogSettings.Instance.ModerationType == BlogEngine.Core.BlogSettings.Moderation.Disqus)
    { %>
        <a rel="nofollow" href="<%=Post.PermaLink %>#disqus_thread"><%=Resources.labels.comments %></a>
    <%}
        else
    { %>
        <a rel="bookmark" href="<%=Post.PermaLink %>" title="<%=Server.HtmlEncode(Post.Title) %>">Permalink</a> |
        <a rel="nofollow" href="<%=Post.RelativeLink %>#comment"><%=Resources.labels.comments %> (<%=Post.ApprovedComments.Count %>)</a>   
    <%} %>
    

    We need to make two changes to the current comments code. Firstly, we need to add an important missing attribute to the anchor tag. The missing tag is the “data-disqus-identifier”. This is recommended practice by the Disqus Developer guide. Secondly, we need to change the “href” attribute to use an AbsoluteLink instead of a PermaLink. The code should now look like this:

    <% if (BlogEngine.Core.BlogSettings.Instance.ModerationType == BlogEngine.Core.BlogSettings.Moderation.Disqus)
    { %>
        <a rel="nofollow" href="<%=Post.AbsoluteLink %>#disqus_thread" identifier="<%= Post.Id.ToString() %>"><%=Resources.labels.comments %></a>
    <%}
        else
    { %>
        <a rel="nofollow" href="<%=Post.RelativeLink %>#comment"><%=Resources.labels.comments %> (<%=Post.ApprovedComments.Count %>)</a>   
    <%} %>
    

    From personal experience, I believe it is best to carry out the “post.aspx” and “page.aspx” code changes before moving onto the Disqus platform. If you currently have comments that need to be exported to Disqus, I found this exporter tool really useful. Be prepared to carry out a few Disqus imports to get things exactly right.

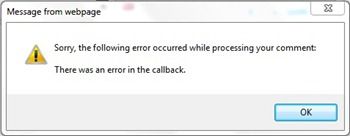
  • Whilst carrying out some tests on my blog after upgrading my blog platform from BlogEngine 1.6 to 2.0, I noticed an error occurring when a comment was in process of getting submitted. The error that cropped up was: “There was an error in callback”. The strange thing about this error was that it only occurred for Internet Explorer users. In other mainstream browsers (I do not class Internet Explorer as a mainstream), my comments were successfully submitted.

    There Was Error In Callback

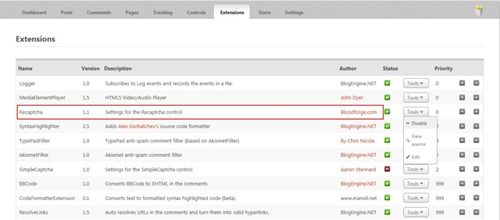
    As it turns out, the issue was due to one of my BlogEngine extensions. When I disabled the “Recaptcha” extension all worked as expected. I still need to investigate what is causing the “Recaptcha” extension to error since this is one of the most important extensions to void all spammers out there.

    Recaptcha Extension

    So if you are also experiencing a similar error, disabling the Recaptcha extension may help.

    I will post further updates if I manage to get the commenting system working using Recaptcha. But since BlogEngine is now supporting the Disqus commenting platform, I may decide to make the move.

  • I upgraded to the really cool BlogEngine 1.5 last week. I was surprised to find out that I was three versions behind. Nevertheless, the guys behind BlogEngine always know how the make the upgrade really easy!

    When I tried to publish a blog posting using Windows Live Writer, I came across two problems. The first problem I had was the dreaded “Object reference not set to an instance of an object” error. I really hate this error! This has to be the most useless error message in .NET!

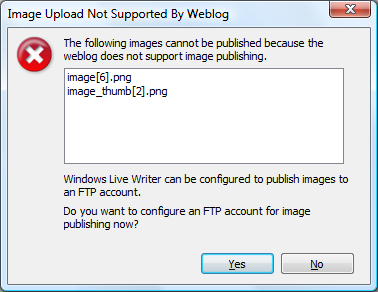
    The second problem I came across was the inability to upload images and the following error occurred:

    WLWImageUploadError

    After some good old research on the web and reading various BlogEngine Discussion forums, fixing these errors is as straight-forward as installing BlogEngine.

    To fix the “Object reference not set to an instance of an object” error all you have to do is create a new blog account in Windows Live Writer. Just updating your account configuration will not resolve this issue. You have to setup a new account. I think this will update the wlwmanifest.xml file in your site directory. Once you have successfully tested you can publish a blog post with your new account, delete your old account.

    The image upload issue is caused by permissions restrictions to your App_Data folder. Make sure you have allowed read/write permissions to this folder. For some reason adding read/write permissions to the App_Data folder through my FTP client did not work. The only way I was able to set the permissions is through my Hosting Plan File Manager account.

  • Published on
    -
    1 min read

    Fixing BlogEngine HTML Editor Problem

    I have to say that after using BlogEngine for my first couple of posts, I can't think of any other Blogging tool to use. However, the thing that really annoys me about BlogEngine is the HTML editor when I want to create my postings. I have found that the TinyMCE HTML editor rejects some HTML tags. For example, <code> and <iframe> tags.

    I have been desperately looking through the BlogEngine forum posting's to see if there is anyway to fix this problem. There was no specific way of rectifying this problem.

    However, I found a way to fix this!!! Laughing

    You will need to make a simple change to the tinyMCE.ascx file located in the admin folder (/wwwroot/admin/). Find the following line:

    extended_valid_elements : "hr[class|width|size|noshade],font[face|size|color|style],span[class|align|style],script[charset|defer|language|src|type]",

    Now you will see in this line that there are tag elements listed as valid. All you have to do is add tags to this line in order for them to be accepted by the TinyMCE HTML editor. For example, I want my <code> and <iframe> tags to be accepted:

    extended_valid_elements : "hr[class|width|size|noshade],font[face|size|color|style],span[class|align|style],script[charset|defer|language|src|type],code,iframe",

    And there you have it!

    Hope this helps!